Electronics
Learning about Electronics
Before we could build any circuits with actual substance, we began this unit by learning the basics of electronics. A nightlight isn't much fun when the LED burns out (or when the resistor burns, ouch!). We started with very simple LED circuits on breadboards. We learned about the difference between series and parallel circuits. In series circuits there's only one path for the current, which has a lot of implications. For example, if one component fails, the whole circuit is broken. Or that the current in a series circuit is the same throughout the entire circuit. In parallel circuits, that's not true. The current in each branch is the same, and the total current is the sum of the currents of both branches. An LED in a parallel circuit with multiple LEDs is brighter than one in series (with multiple LEDs) because each LED gets the full voltage of the battery. We also learned a lot of common mistakes, like not using the correct resistance value, or using the reverse polarity on an LED (putting negative side where there is positive charge and vice versa). Then we began to make simple circuits.
Diagrams
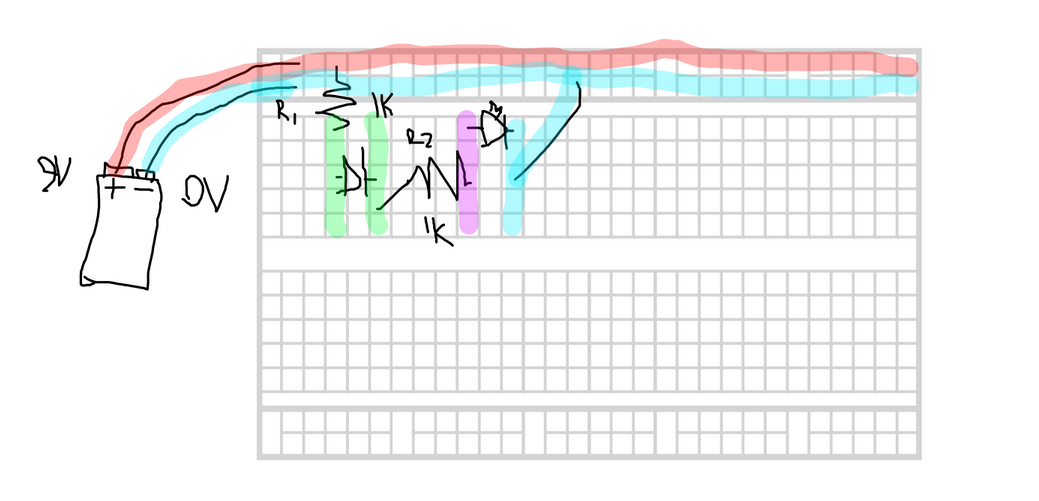
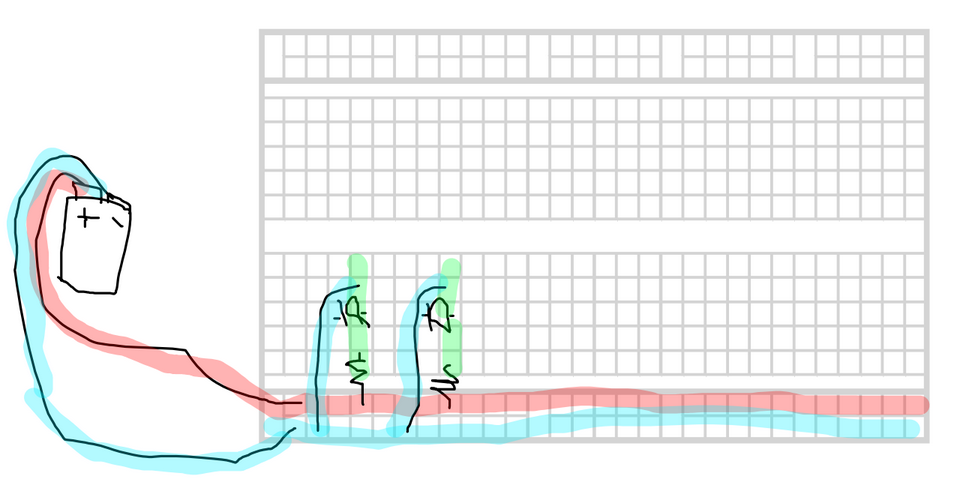
Above (figure 1) is a breadboard diagram of a simple series circuit that I built. The different colors represent different voltages. You can see the resistors, their values, the LEDs, their polarity. It's cool how much a simple, almost abstract diagram, can tell you about a circuit. Another thing we learned is how breadboards work, the internal connections that allow us to power rows instead of just single points. Below (figure 2) is another breadboard diagram, this time of a parallel circuit. Notice that there's no purple voltage because the voltage in each branch is only going through one resistor, so it doesn't get decreased twice.
Night Light
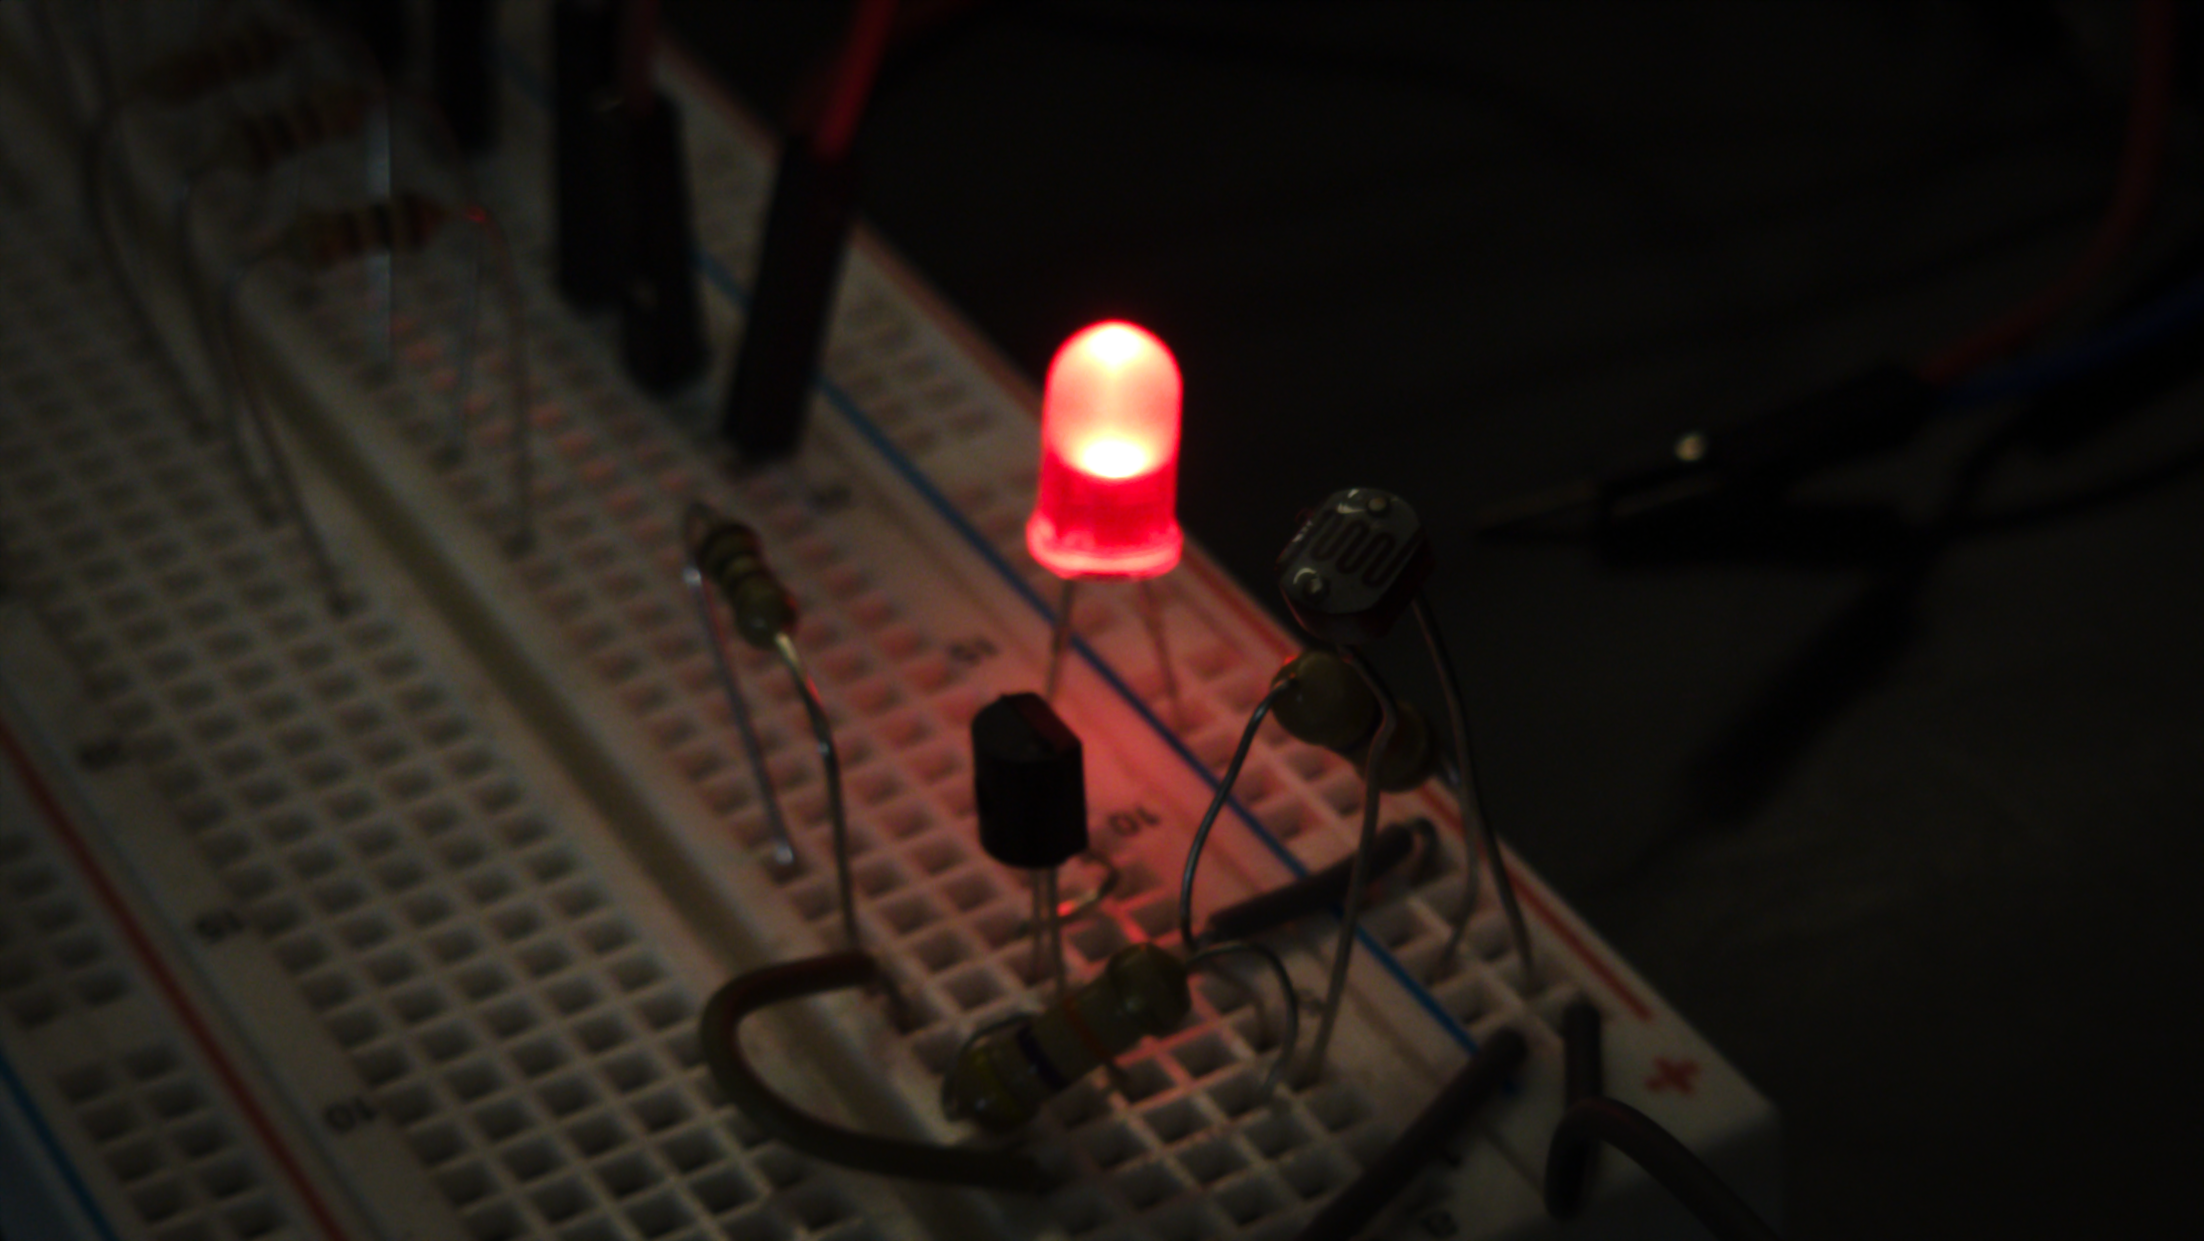
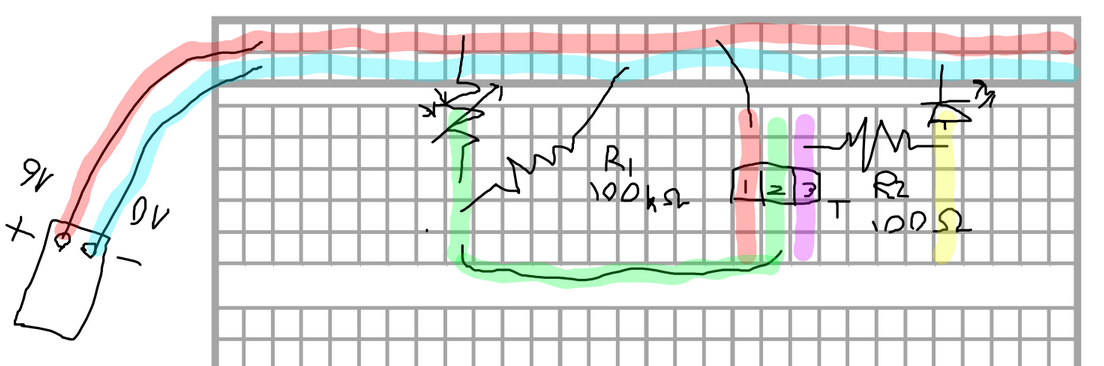
Now that we've learned how circuits, breadboards, voltage, current and all that fun stuff works, let's build something practical. A nightlight! I used a couple new components for this one, a photoresistor, which increases its resistance when exposed to light. As you can imagine, this is very important in a night light circuit. Another new component is a transistor, which are extremely important in modern technology. In this case though, I'll just be using it to modify the amount of current entering the LED based on the amount of resistance from the photoresistor. Below is my breadboard sketch of my nightlight (figure 3). Again, focus on the different voltages throughout the circuit. And below that (figure 4), is a video of my nightlight in action!
Conclusion!
Overall, this unit had more hiccups than the last, it was a little less straightforward, but I definitely learned a lot of valuble lessons. Problems can arise from less thought of places, which can be interesting. For example, we were taught to carefully check the polarity of our LED's, as that was a common point of failure, but since we were so focused on that, a lot of problems arose from just loose resistors or two components accidentally touching, which lead to the circuit not working as expected (or at all). For the night light circuit, there wasn't any resistors left with the resistance I needed (100K ohms). But lucky for me there were plenty of resistors with half of that resistance value, so when I actually built my circuit, I used two 50K ohm resistors, which worked perfectly fine. In 9th grade physics we did work with circuits and breadboards, but this was definitely a great refresher. I definitely understand more about how everything works on a smaller scale now. I think knowing how electricity works is an extremely important skill to have, especially with how entrenched it is in our lives today. What I've learned here will definitely be important to whatever I do in life, from fixing a spotty light in my future apartment (or house, hopefully) to maybe even working on machinery. It's also cool apply the problem-solving skills that I learned in the last unit to this unit. I think I'll definitely be able to apply those same skills to future units (coding for example, there's a lot of problem solving to be done there) as well as life in in general.
last updated 1/17/2025