Light Sculpture
The Idea
Originally, I wanted to model my light sculpture after a spaceship from a game that I enjoyed. After about a week of working on my model in CAD, I realized that I likely wouldn't be able to complete it in the time frame. So, I decided to switch course. I decided on a castle. It made sense, castles have lights (torches), and another plus was that it seemed doable in my time frame! Last summer I went to Spain with the school band. On that trip I saw many castles - they're everywhere. No doubt my decision to choose to make a castle was influenced by these castles. Below is a picture I took during that trip quite close to the tower of one of these castles. This was in San Sebastián.

CAD
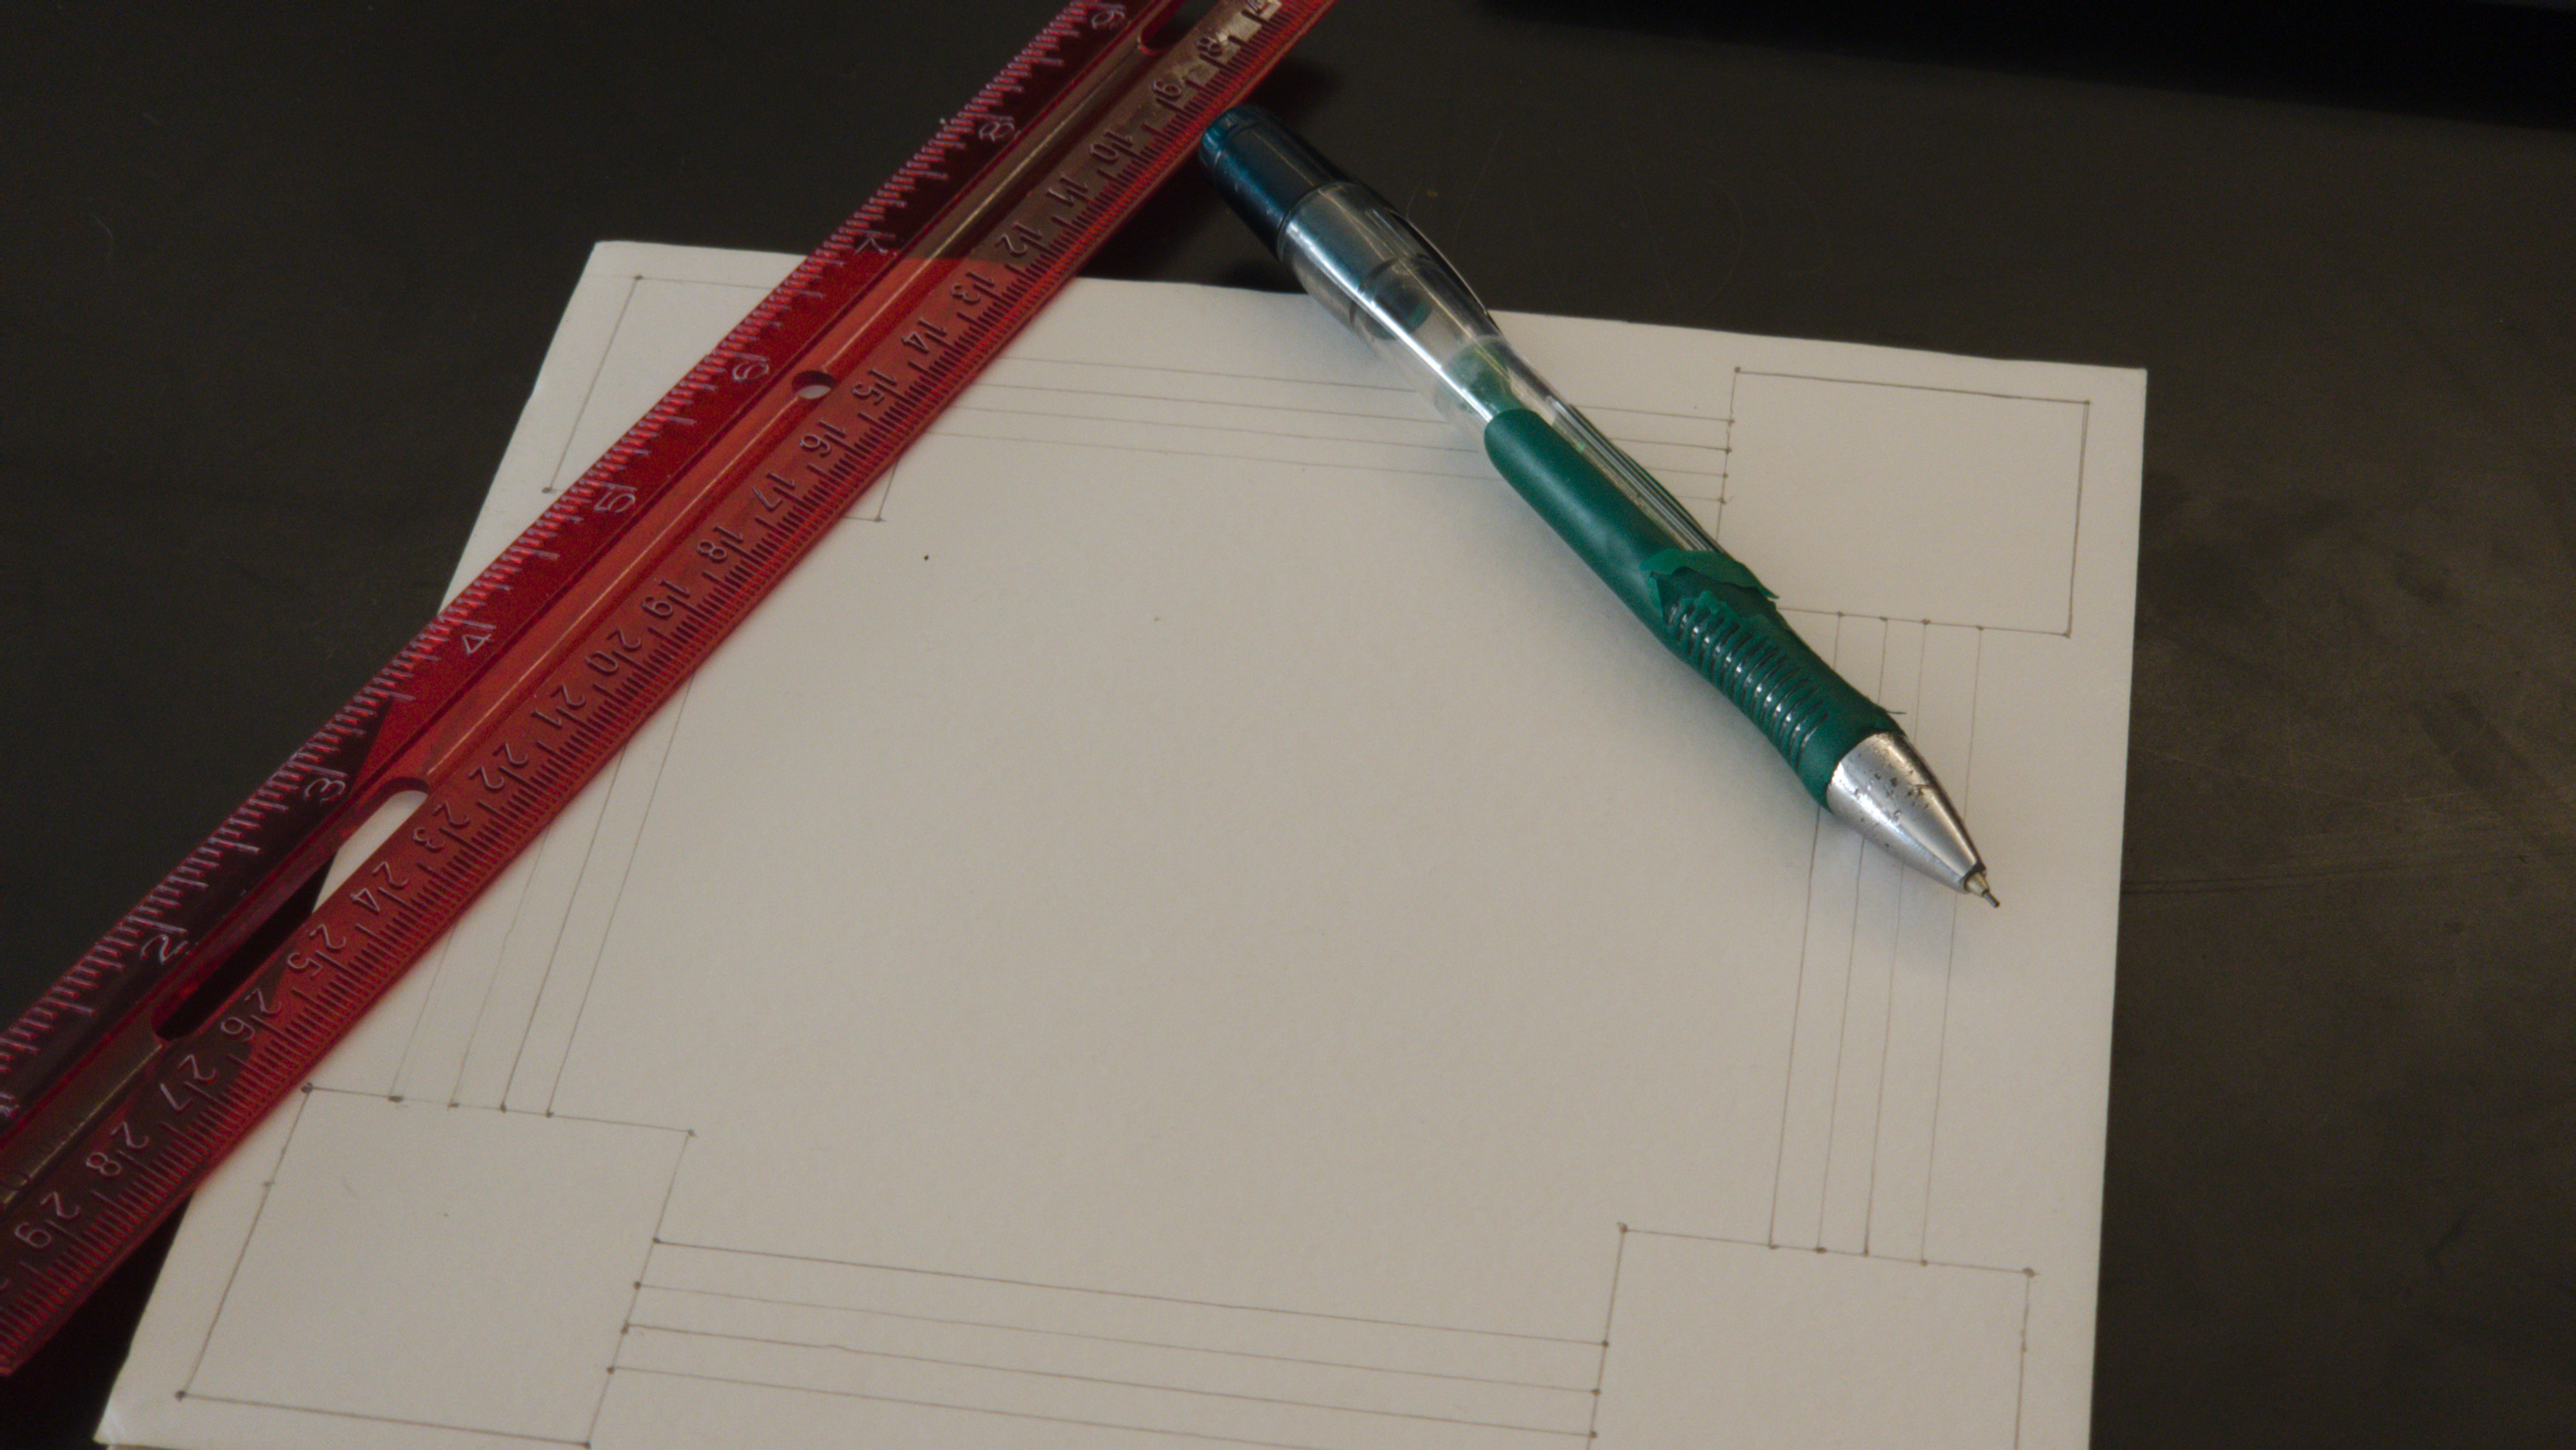
My CAD went through many iterations and restarts, some of which I will talk about later. By the time I got to my final CAD, I was very precise. There are many limitations when it comes to foamcore, which is the material we were using to construct our projects. Firstly, you can only have a certain amount of total surface area, no more than 600in^2. As well as this, all parts needed to be 3/16 of an inch thick. This means that I had to be very creative in order to design my light sculpture while avoiding these requirements. This means that even something like a tower (figure 2), which just looks like a solid object in my final product, consisted of 10 different parts. I also had to make sure that all of my sketches were defined, and that all of my measurements lined up with each other, as I was modeling each larger part in an isolated parts studio. I also had to make sure that there was room for the arduino, and that there was not only holes for the LEDs to rest in, but that there were as well holes in solid objects (like the towers) that would allow me to put my wiring through them.


Laser Cutting
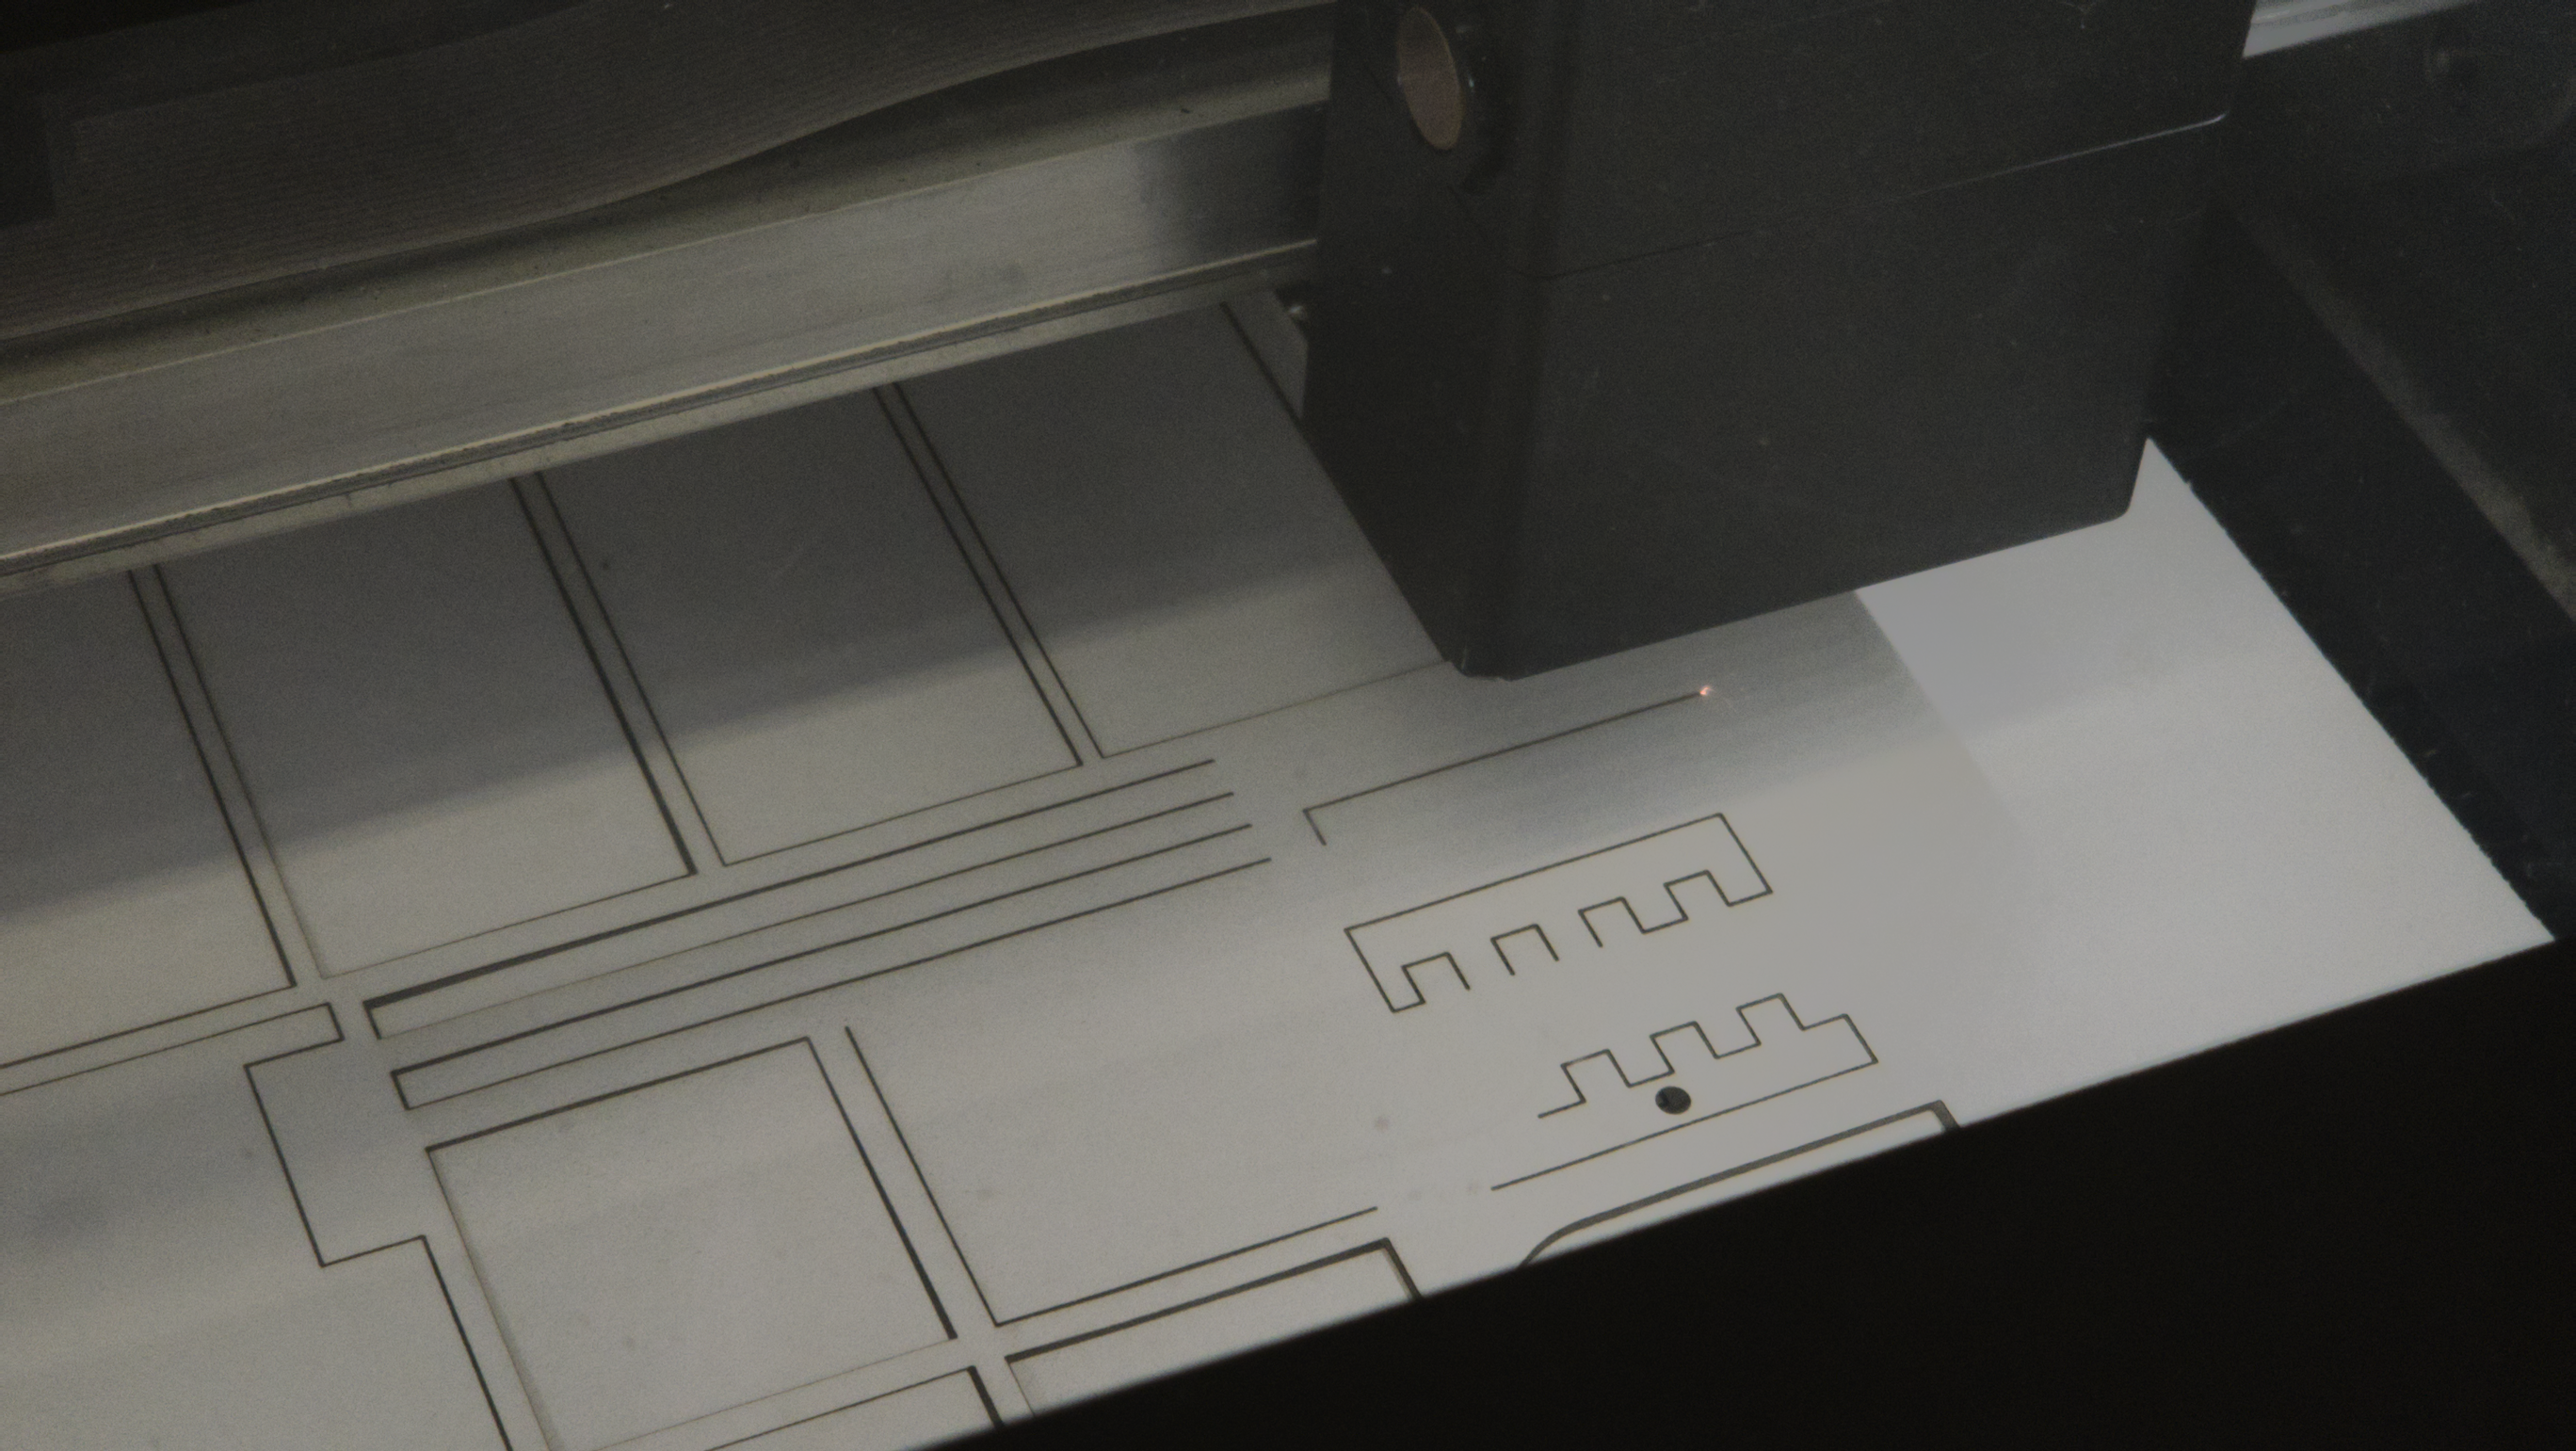
The laser cutting process was relatively simple. First, I had to create a drawing in onshape. After I completeted that, lining up all my 3/16in parts on the drawing, I went to the laser cutter. From there, I put my drawing into the laser cutting software. I ended up cutting three times, using in total two sheets of foamcore, as the laser cutter wasn't big enough to fit my entire project. Below is a picture of the laser cutter in action, cutting my foamcore!
Soldering
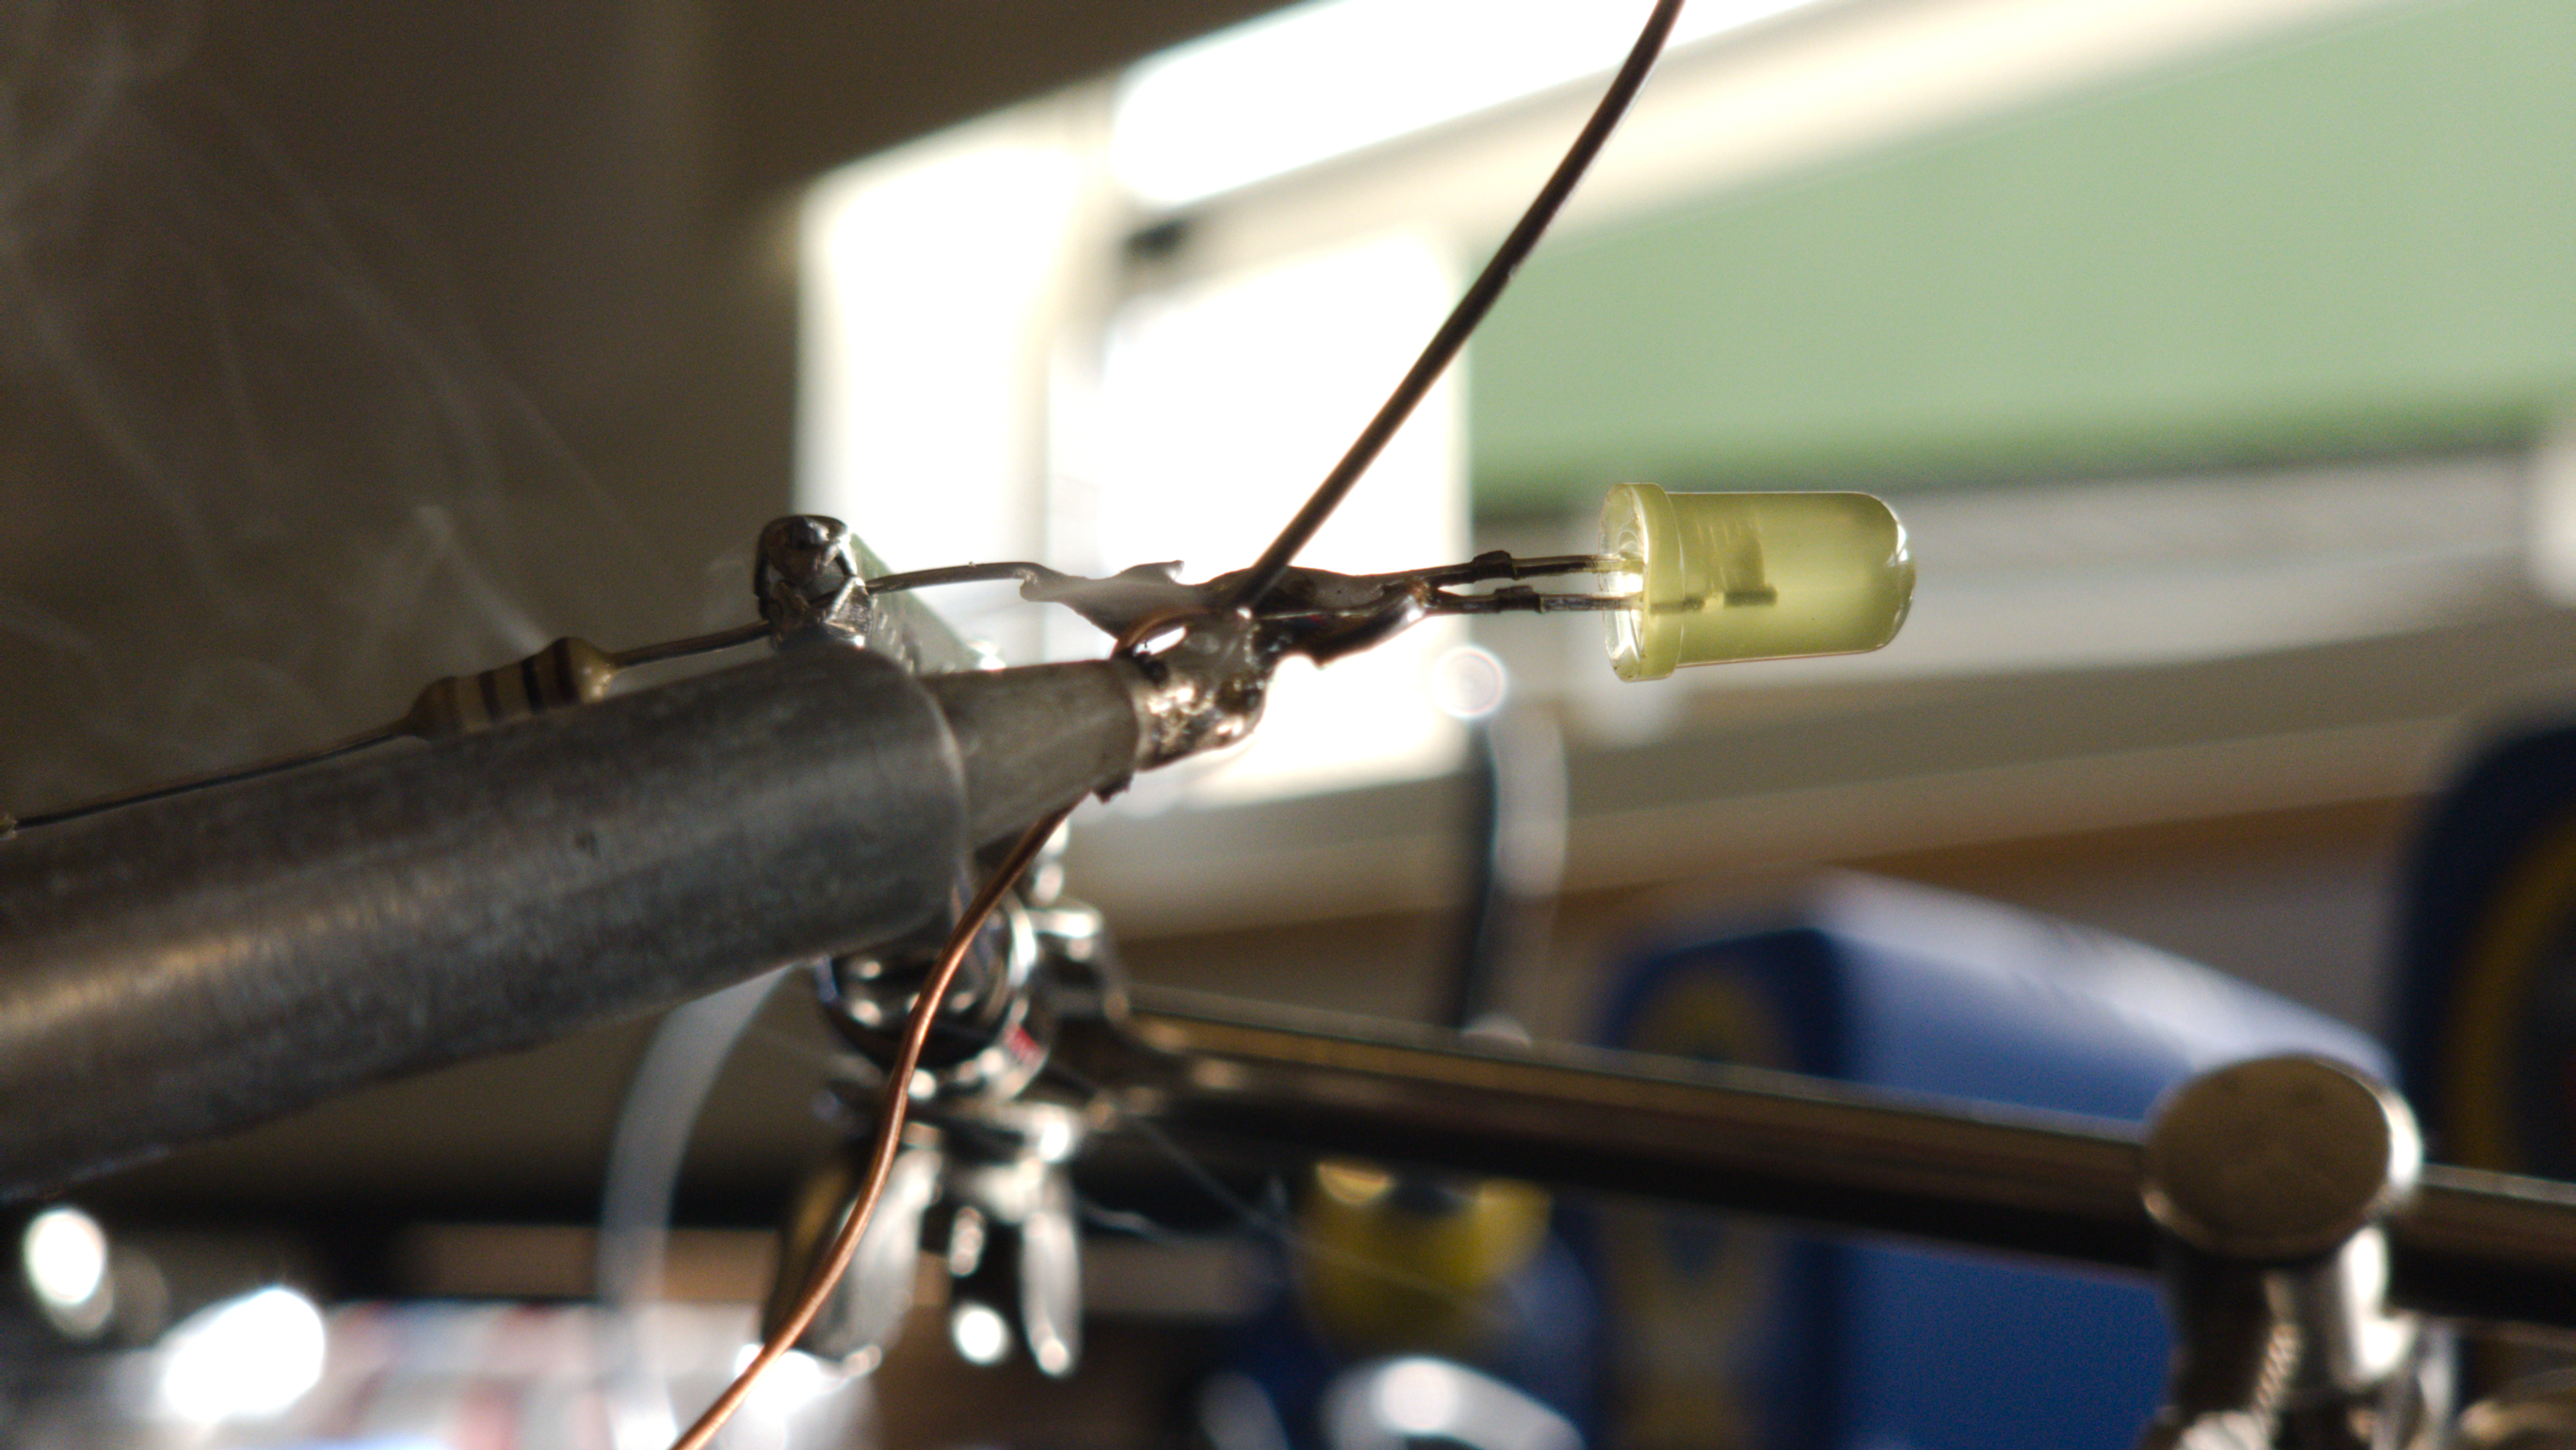
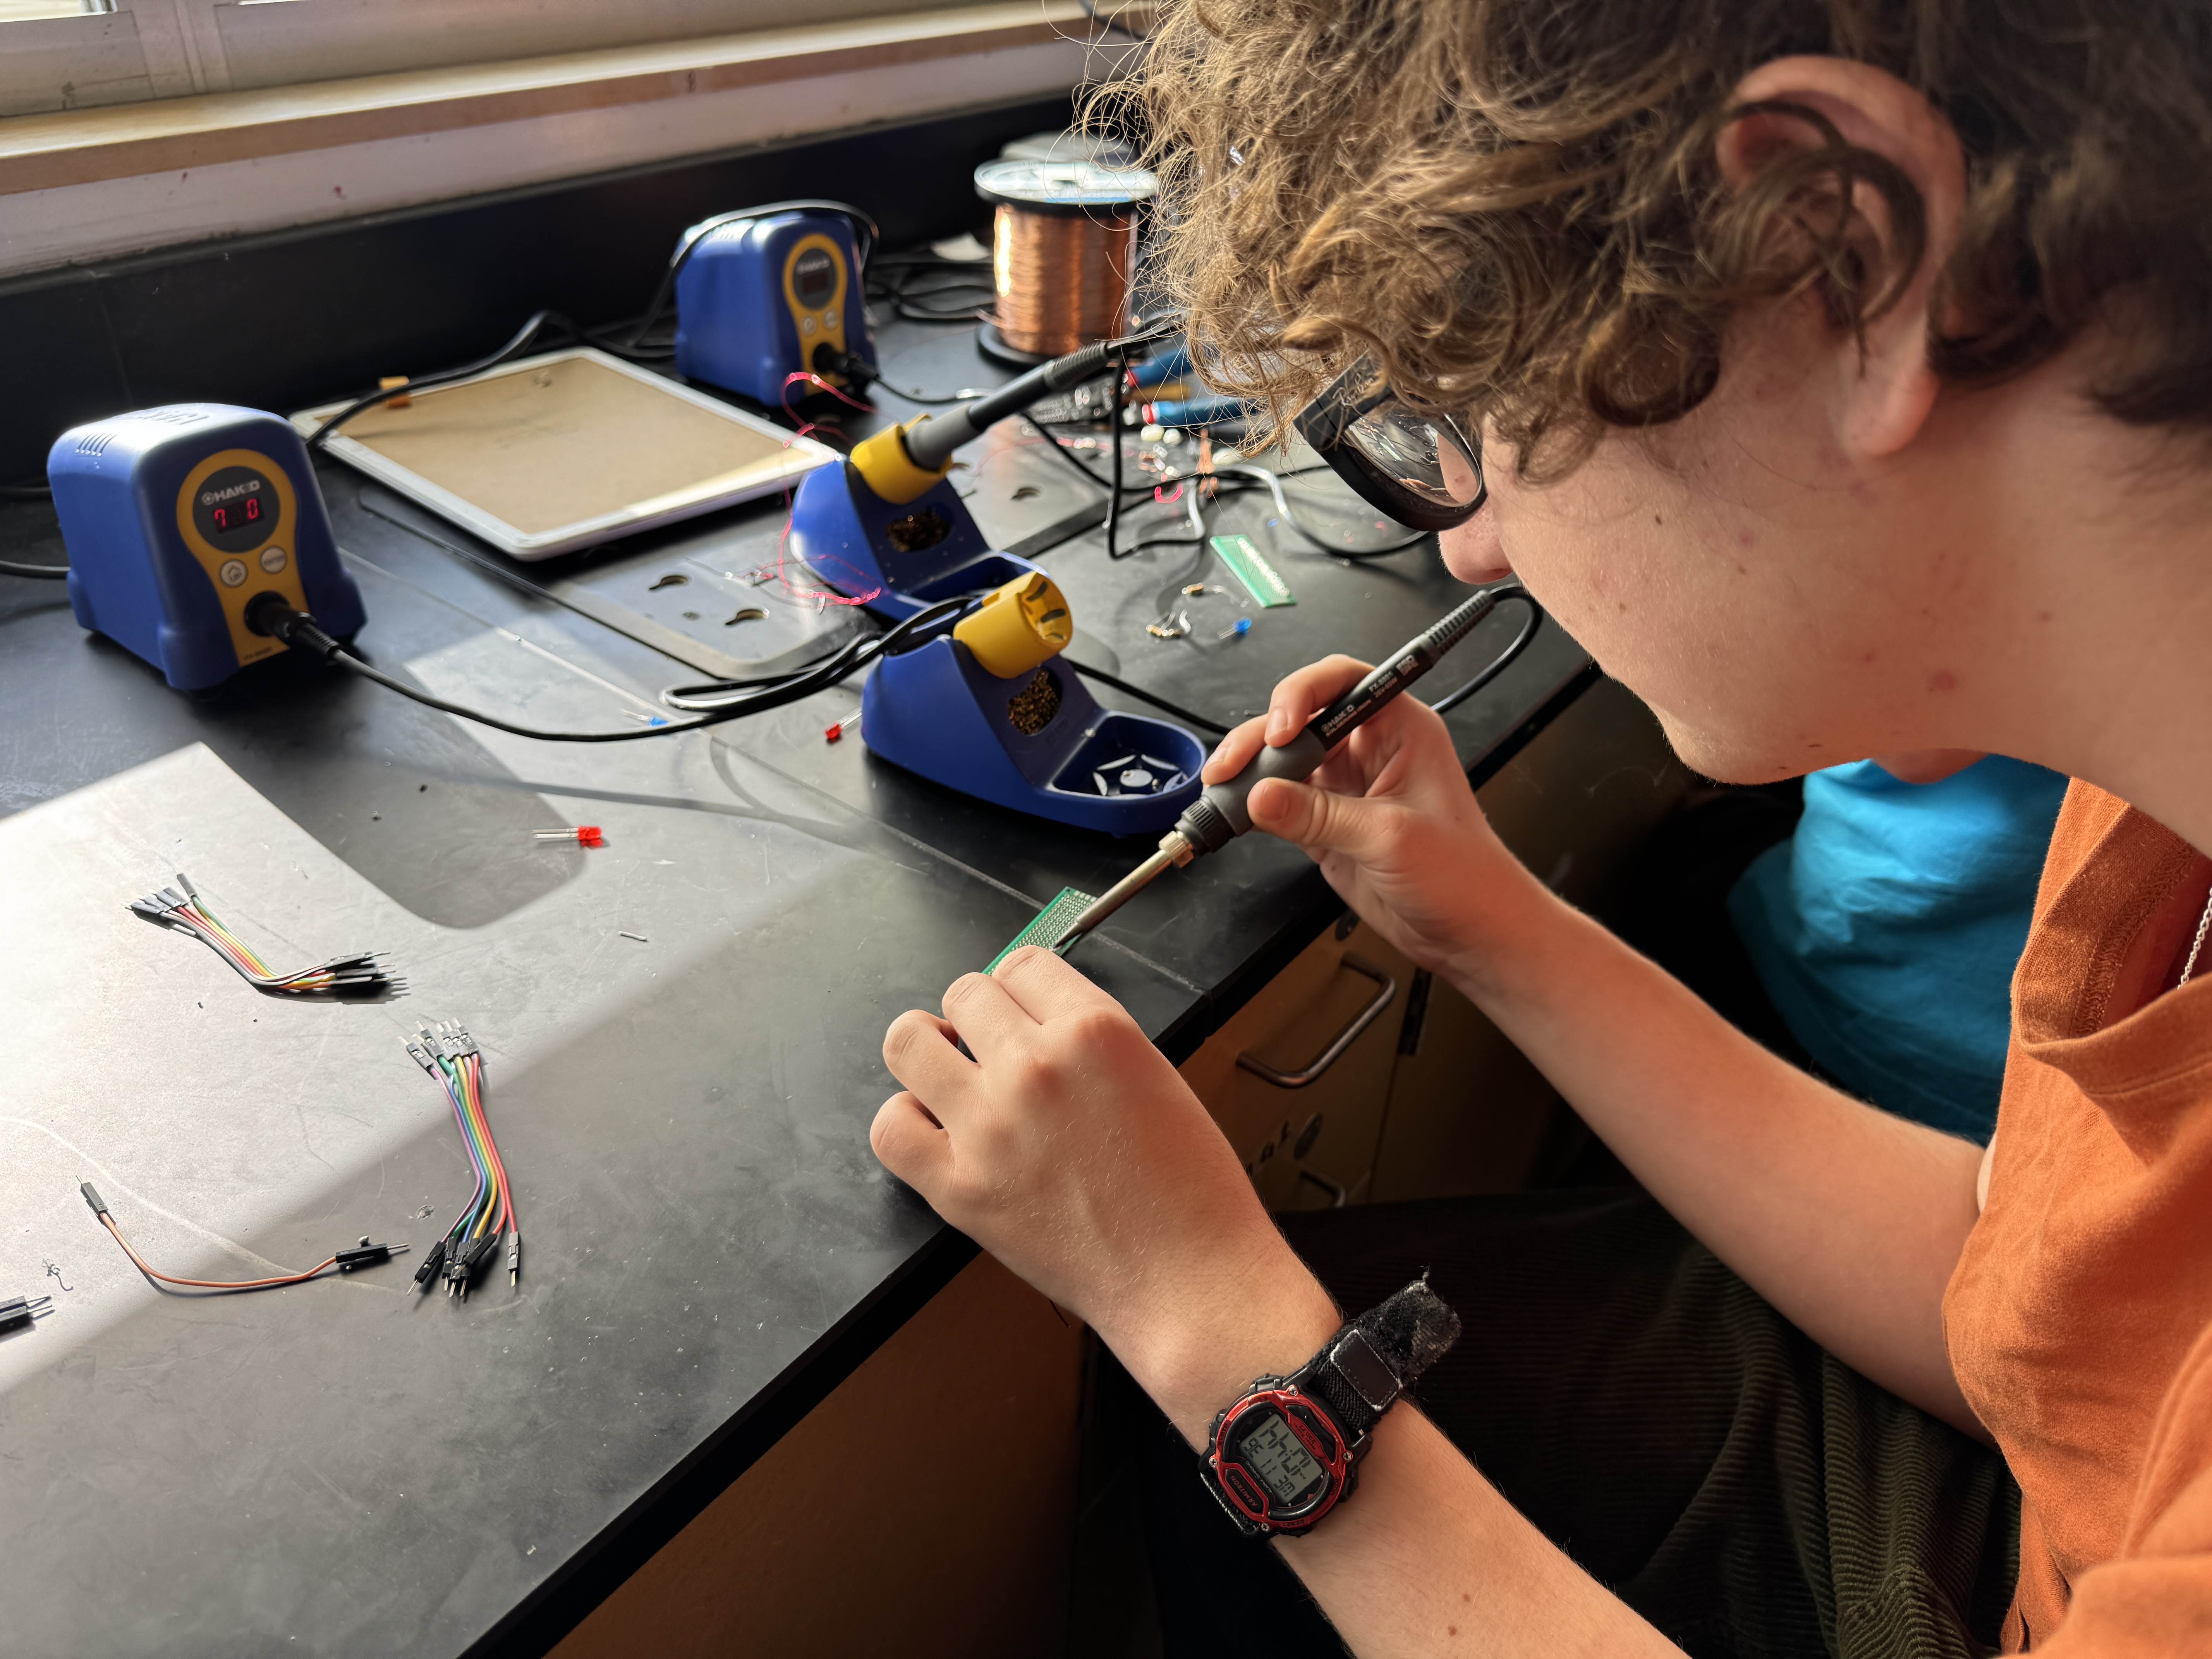
I would definitely consider soldering one of the most useful skills that I learned in this class. It's very useful, and it was definitely a major part of constructing my project. Even before laser cutting, I got a head start by soldering my 100 ohm resistors to my LEDs for my light sculpture circuit (figure 5). Then, after I began construction on my project, I began to solder more wires to connect the LEDs to the arduinos and to the perfboard, which contained all of the ground connections soldered together. You can see me working on that in figure 6. Soldering definitely takes practice, but by the time I was doing my final connections - soldering my potentiometer to my circuit - I was feeling pretty good about it.
Assembly
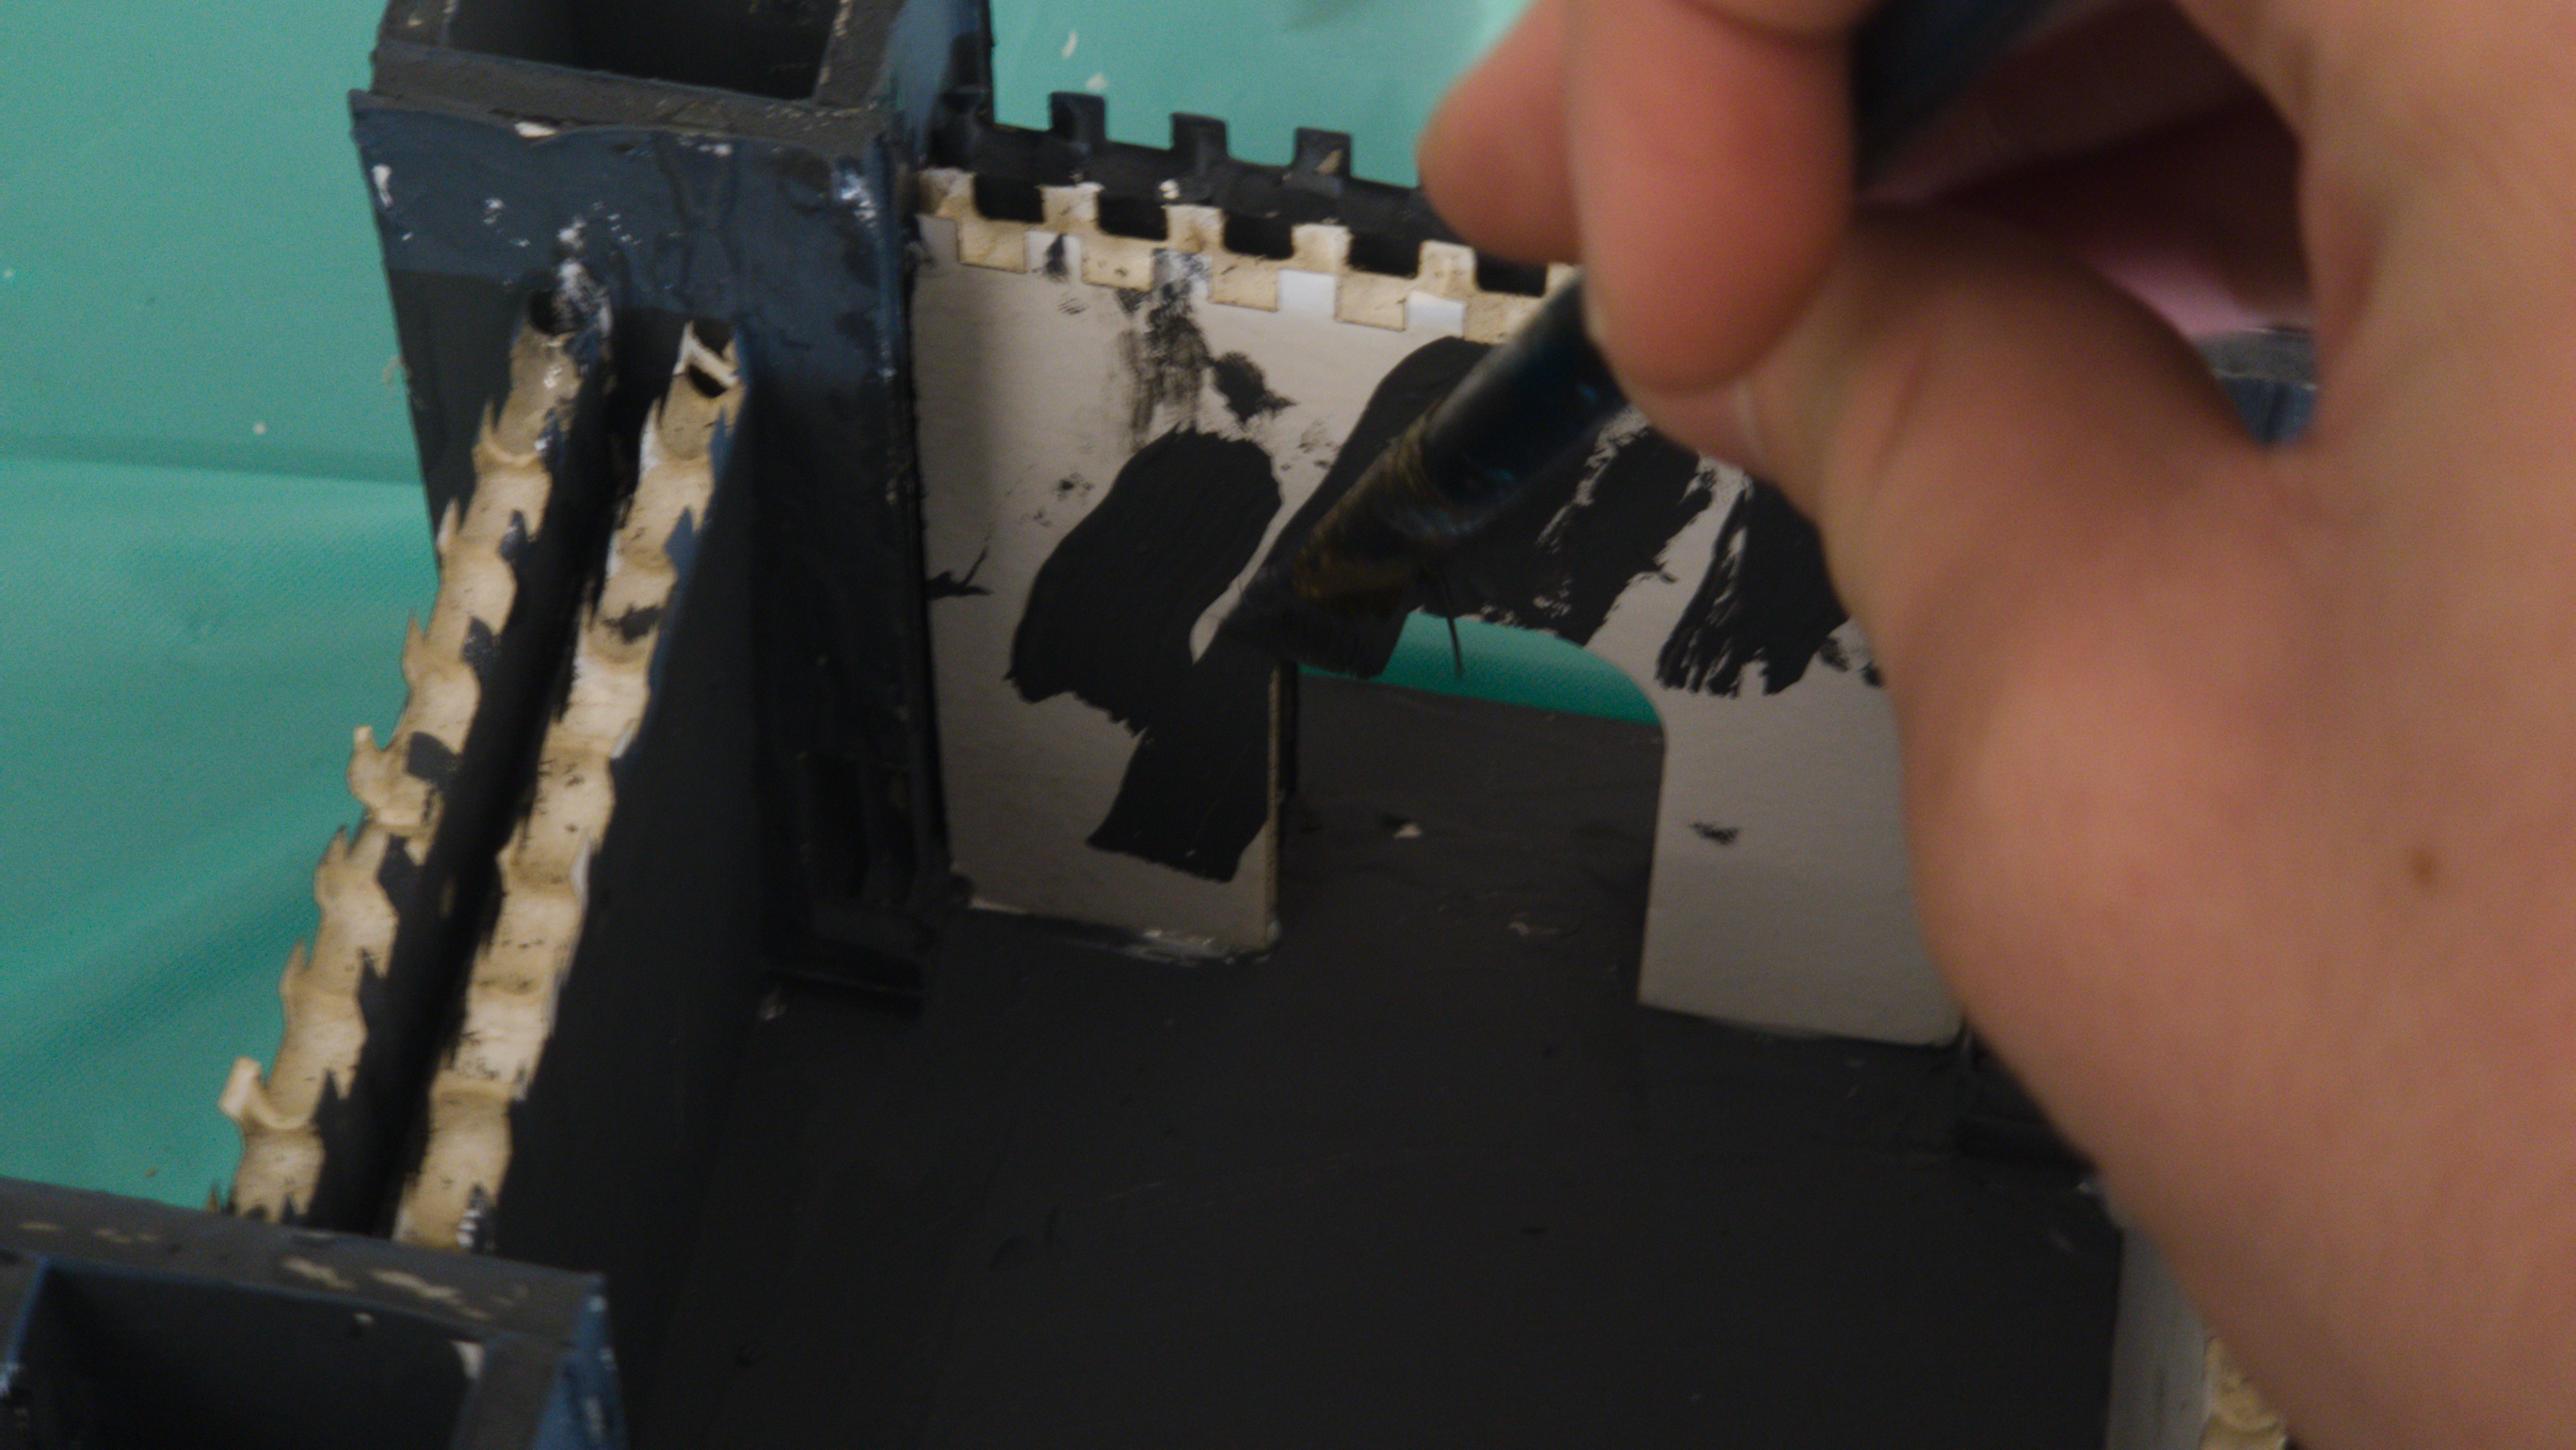
This was definitely one of the easier parts of my project. I began by measuring and marking my base sheet of foamcore (figure 7) with where the walls and towers should go based on the measurements from my CAD model. After the basics were in place, everything else pretty much fit together, exactly how I modeled it in CAD. Overall, it went mostly smoothly. I also began painting part way through the assembly process, so I could reach parts that would be harder to reach once I finished. And this brings me to the next part!
Painting
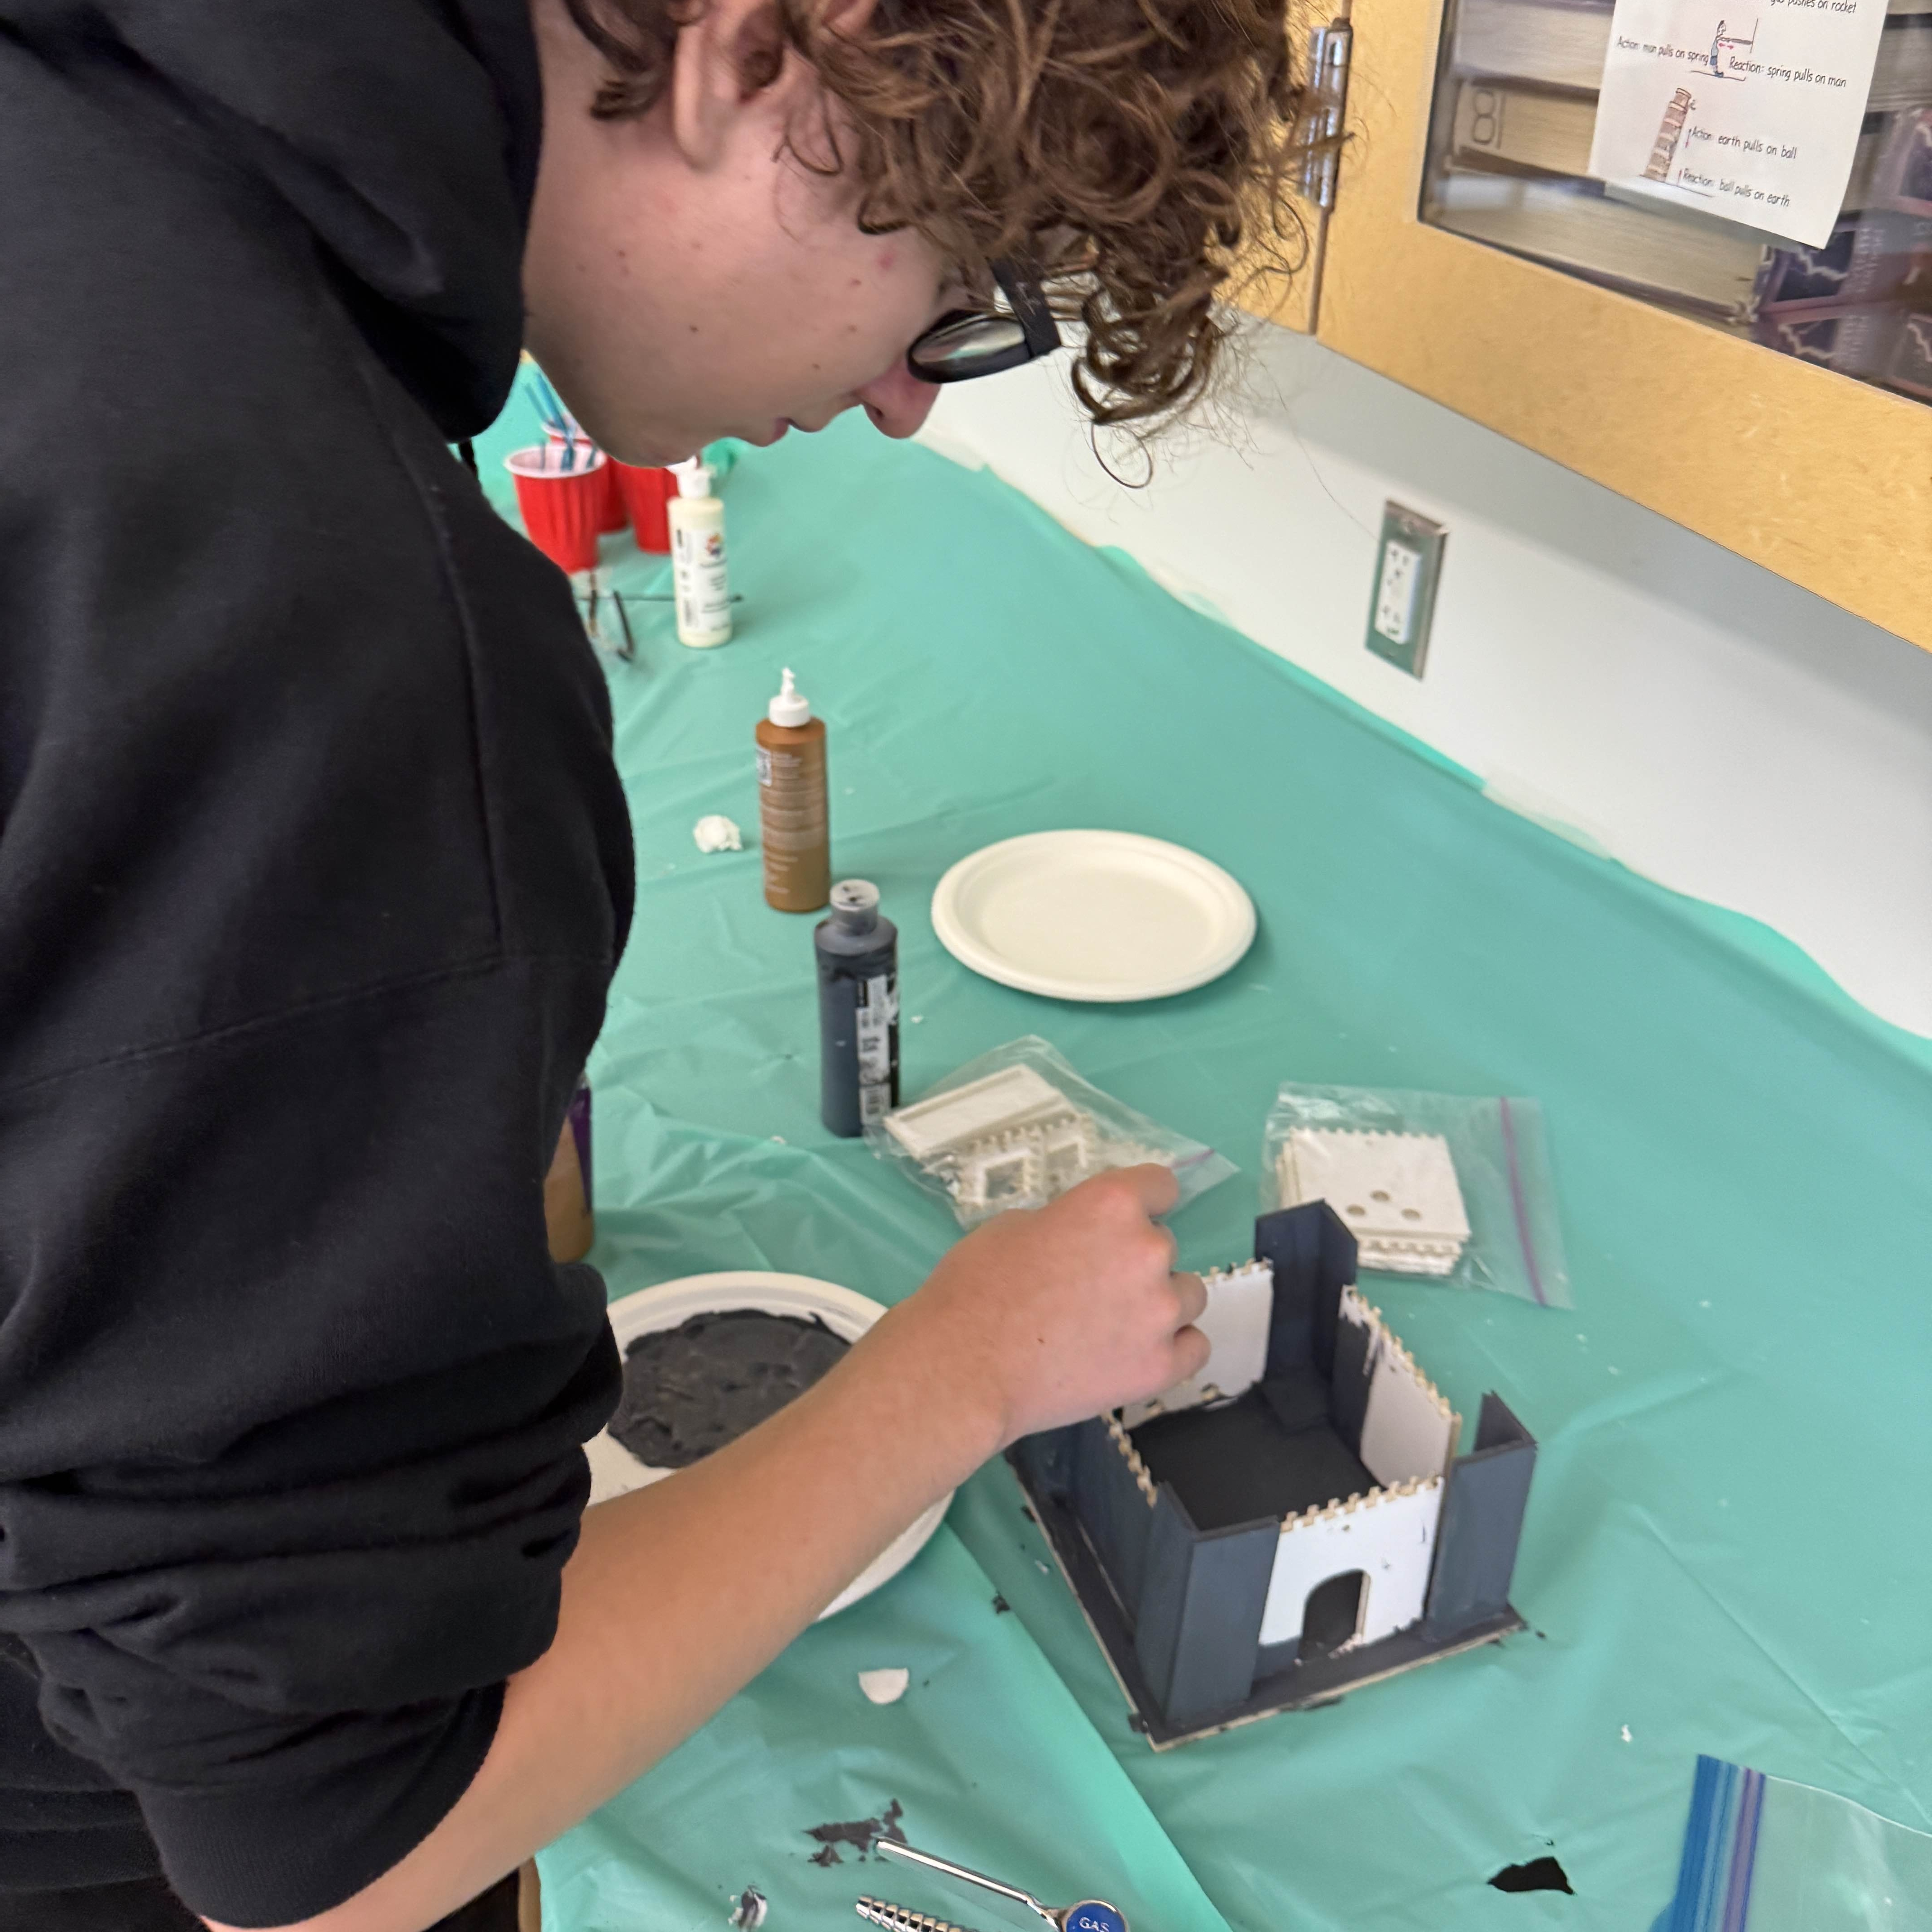
I began by painting everything a matte grey color that I made from mixing white and black paint together. The painting process took a few days, as I was doing it at the same time as the construction process, so I had to keep my paint in a plastic bag to mantain the same shade. It went pretty well, but my original vision was a cool rugged brick pattern. We didn't have any brushes small enough for detailed bricks, so I went for a more abstract, artistic approach to the bricks. It was a "trust the process" moment for sure, but in my opinion it turned out nice. Below are some photos of me painting.
Programming
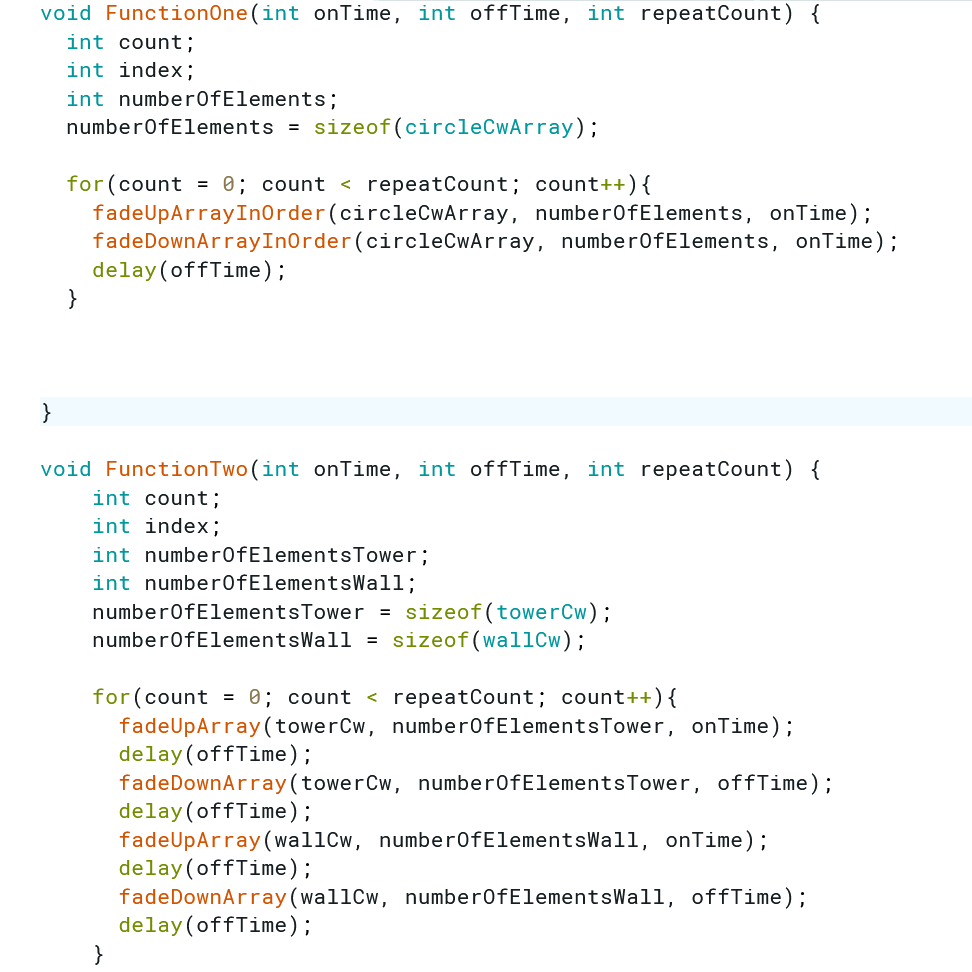
I wrote my code the night before the light sculpture was due, but I think I used my time very well. I first mapped out the LEDs and their corresponding arduino pin numbers on a piece of paper, then I used that information to create my arrays. I took advantage of some built in functions, combined with some of my own code and arrays, to build five different functions for my light show. I really liked the built in "fade" functions that could fade individual LEDs, as opposed to just blinking them. I used those in all of my custom functions to make my lights look more "natural." They are supposed to be torches after all! But I still tried to make it as entertaining as I could, and I think I did well. Below are my first two functions. The first one creates a smooth looping effect around my structure, and the second softly blinks the LEDs on the towers, then the ones on the walls.
Conclusion
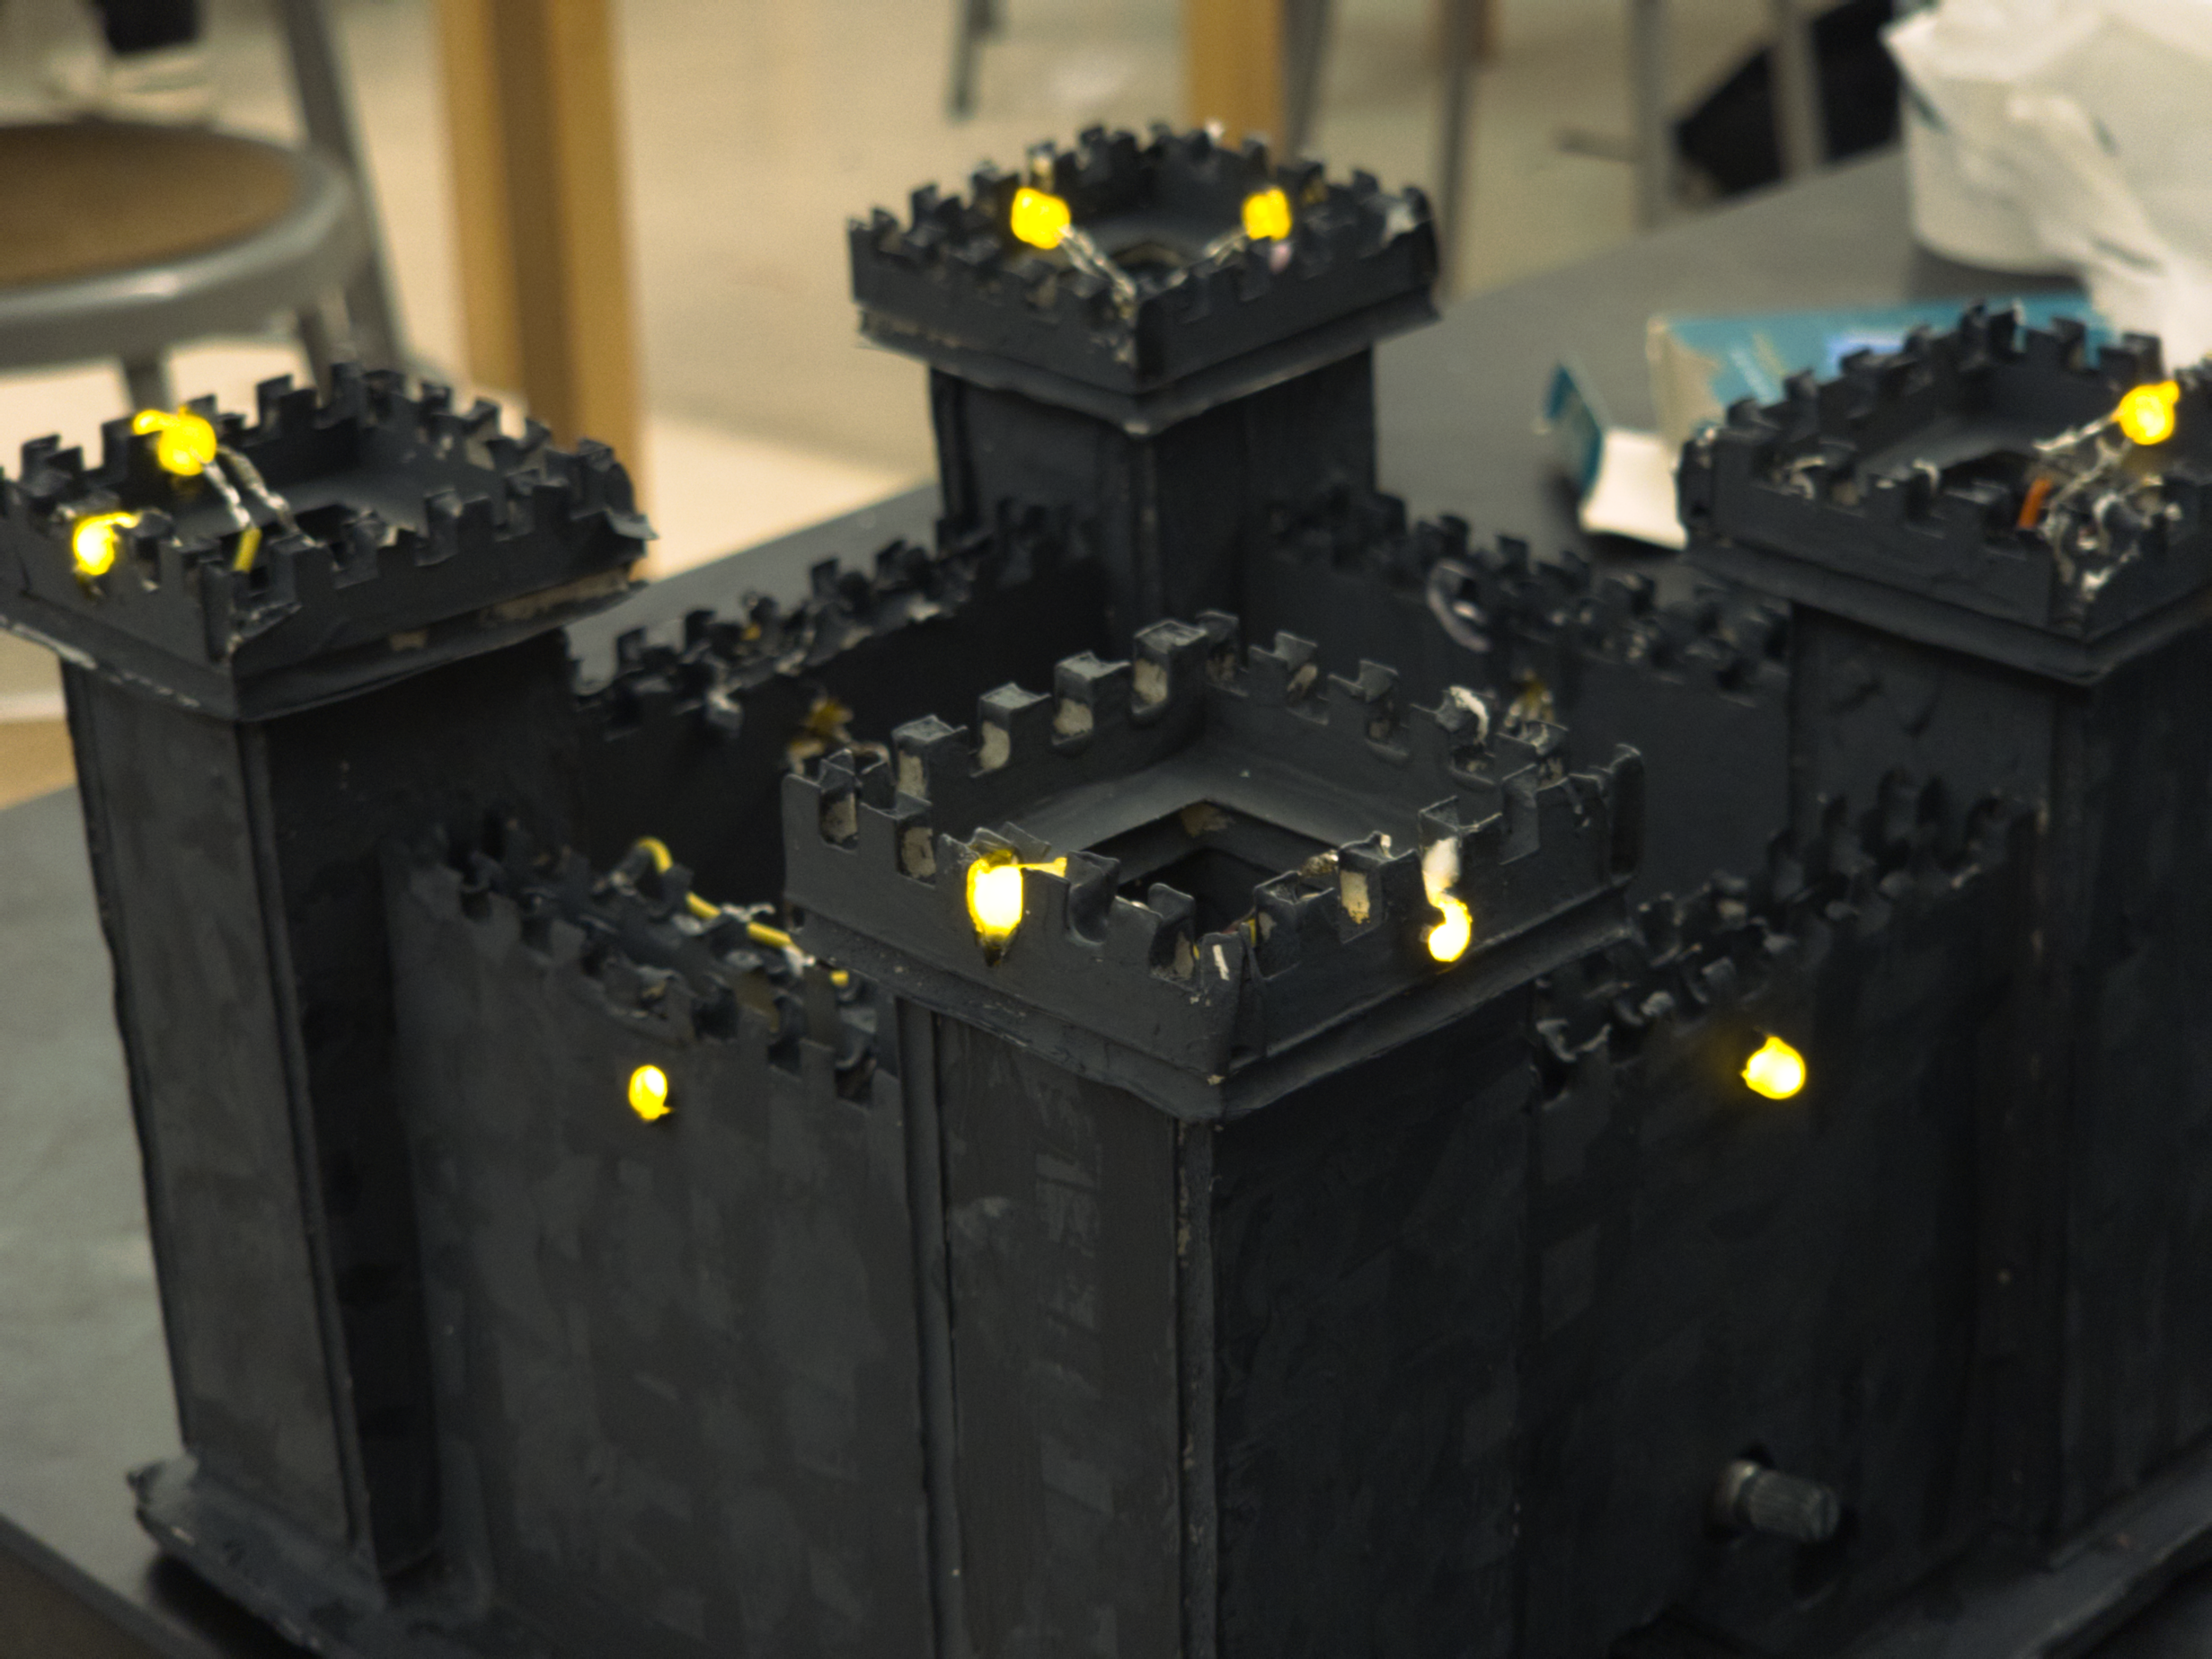
I definitely had to overcome a lot of challenges over the course of this project. Probably the most for any project that I've done. Firstly, in the CAD stage, as I mentioned, I had to completely change course a few weeks in. But what I didn't mention is that I also had to restart my CAD again, because I decided to switch from 3D printing to laser cutting. And I had a fully completed and detailed model for my 3D print, but it turned out that I would still need to create a foamcore version of my CAD (following the foamcore rubric) to get credit for the CAD. So I restarted. But the third time through I was much more experienced. I was very methodical, and there weren't any moments where I faced any huge problems in the CAD process after that point. For soldering, I completely unsoldered my copper wires because they were very difficult to work with. I replaced them with solid core wires, and that made it much easier. I still had a ton of problems throughout the soldering and assembly process though. My original ground solder wasn't that great. Connections kept snapping. I even had an LED burn out! And the pins fell out of two of my LEDs! I hadn't ever heard of that happening! And don't get me started on trying to fish the LEDs up the towers and into the holes. But against all odds, I eventually finished my project on time. And the day before the project was due, when I realised that I could actually finish it on time, I felt super relieved. I began to slow my work down and use my time helping people. A lot of people were struggling with programming, and since I have previous experience, I was able to help at least just get people set in the right direction. That felt pretty great to be honest. That I was needed. Below is my finished light sculpture on display at the Exploratorium!
last updated 1/17/2025