Programming
Tools and Setup
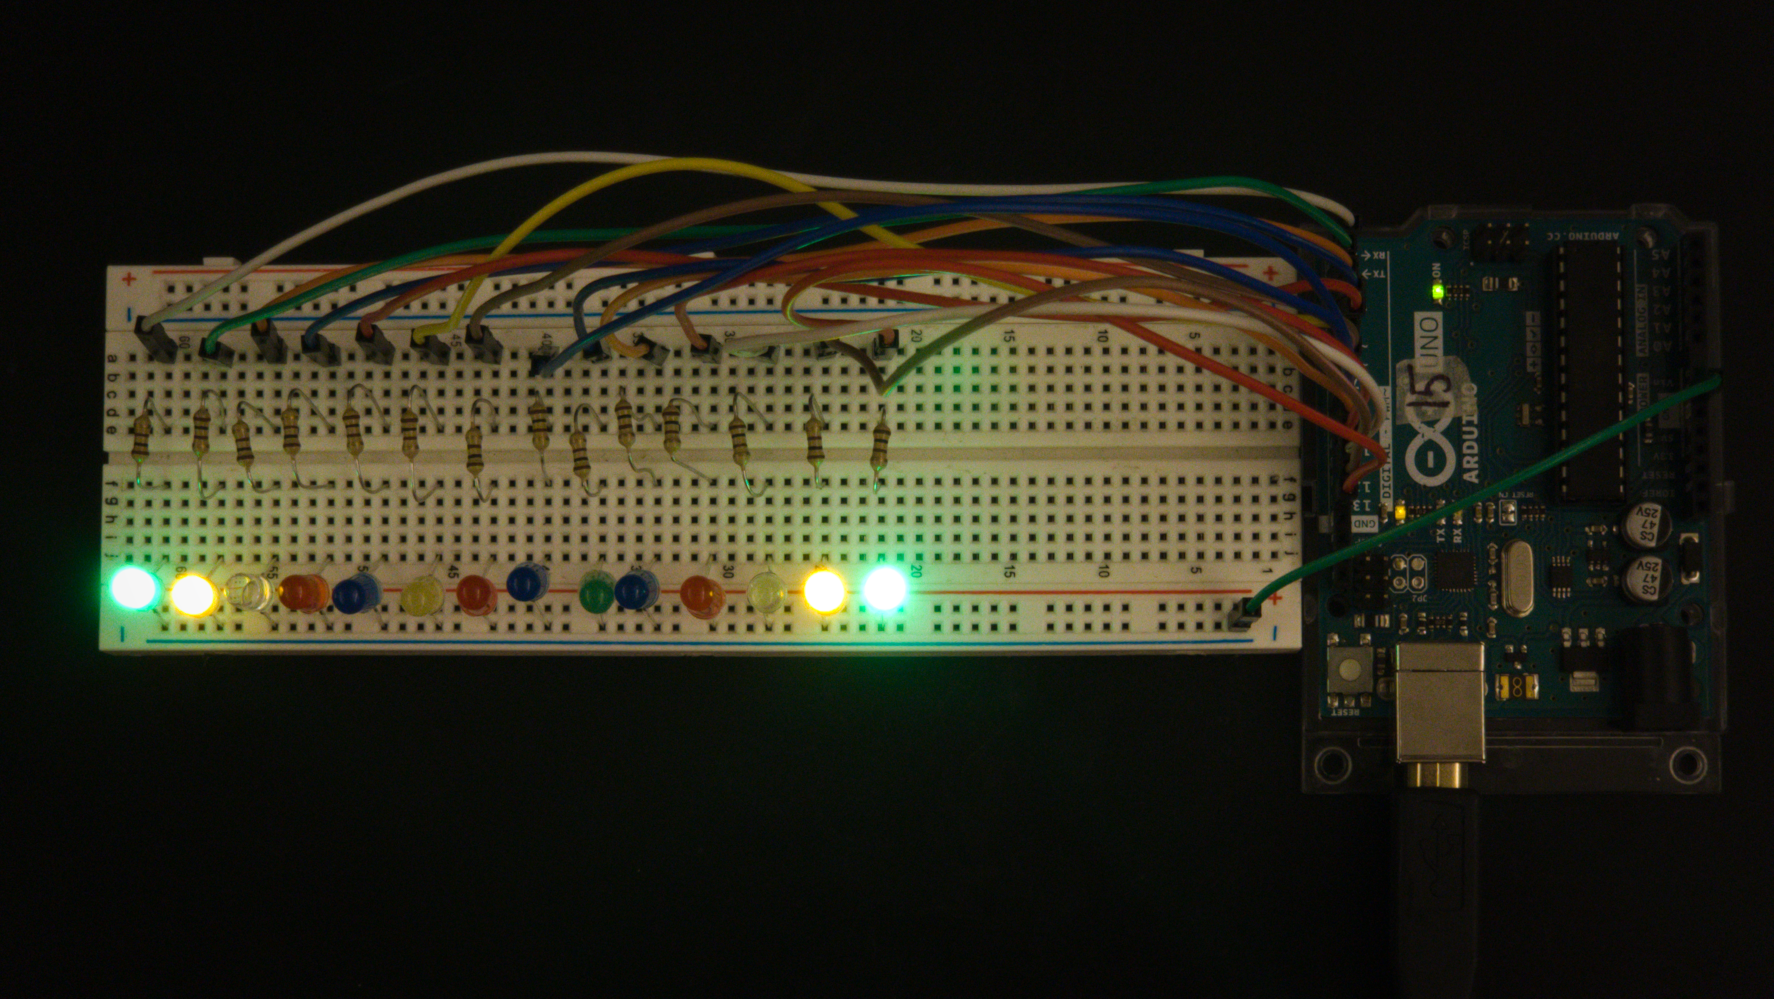
In this unit we began to work with Arduinos, which are small devices that, put simply, allow a user to control electronics through code (by using pins that can both take input and output in the form of electricity). These devices will eventually be used in our light sculptures! To upload (c++) code to an Arduino, we used the Arduino web IDE (app.arduino.cc), and sent the code through a USB cable to the Arduino. This USB cable also supplied power to the Arduino. Before we could do any real programming though, we had to set up our breadboard with lights, and arguably more importantly, resistors (which are necessary as the Arduino supplies 5 volts, which is far too powerful for the LEDs, and would burn them out). Below (figure 1) is my breadboard, complete with resistors, LED's, and my Arduino. As I'll explain later though, the wiring in this exact setup needed some slight modification to work properly.
Giffer
This unit was primarily focused on a little learning tool called Giffer Reborn. Giffer has 60 unique exercises which slowly introduced us to new programming topics. Giffer simulates a breadboard, with 14 leds powered by 14 different pins (numbered from 2 to 15 inclusive). The most popular approach to these exercises, and the one that I did, was to simply run the code, compare it to the correct example (Giffer always gives you an example of how the exercise is supposed to run), and modify it to fit that example. Below, I'll explain three of these exercises!
Exercise 16
Above (figure 2) is my code and the gif for exercise 16. As you can see, there's a lot to the code. Firstly, the flow of execution. The setup() function (everything inside the curly brackets after setup()) runs once when the Arduino first recieves power and loop() function will repeatedly run as long as the Arduino has power. In the setup() function, I initialized all of the pins as output pins using a while loop. A while loop will run continuiously, checking every time if the condition inside the parenthesis is true. Once it's false, the loop will stop and the code will continue normally. To intialize the pins, I created an int variable (variables, put simply, store values, an integer variable stores a whole number) called ledNumber. ledNumber starts at 2, and the loop ends once it reaches 15. Every time the loop is run, ledNumber increases and using pinMode with ledNumber as the pin, I initialized all of the pins from 2 to 15 as output pins. In the loop() function, I created a new ledNumber variable, initialized it to the value of 2, and created another integer called otherLedNum. After this, I have two more while loops. The first one runs until ledNumber hits 8, it sets otherLedNum to equal seven more than ledNumber (which is the counterpart to ledNumber on the other side of the Arduino in the gif). Then it turns on both ledNumber and otherLedNum using the digitalWrite function. It waits 200 milliseconds, then turns both off and adds one to ledNumber. The second loop does the same thing, except it starts with ledNumber at 7 and decreases until ledNumber is 3, then the whole loop() delays for 4 seconds, then it restarts.
Exercise 36
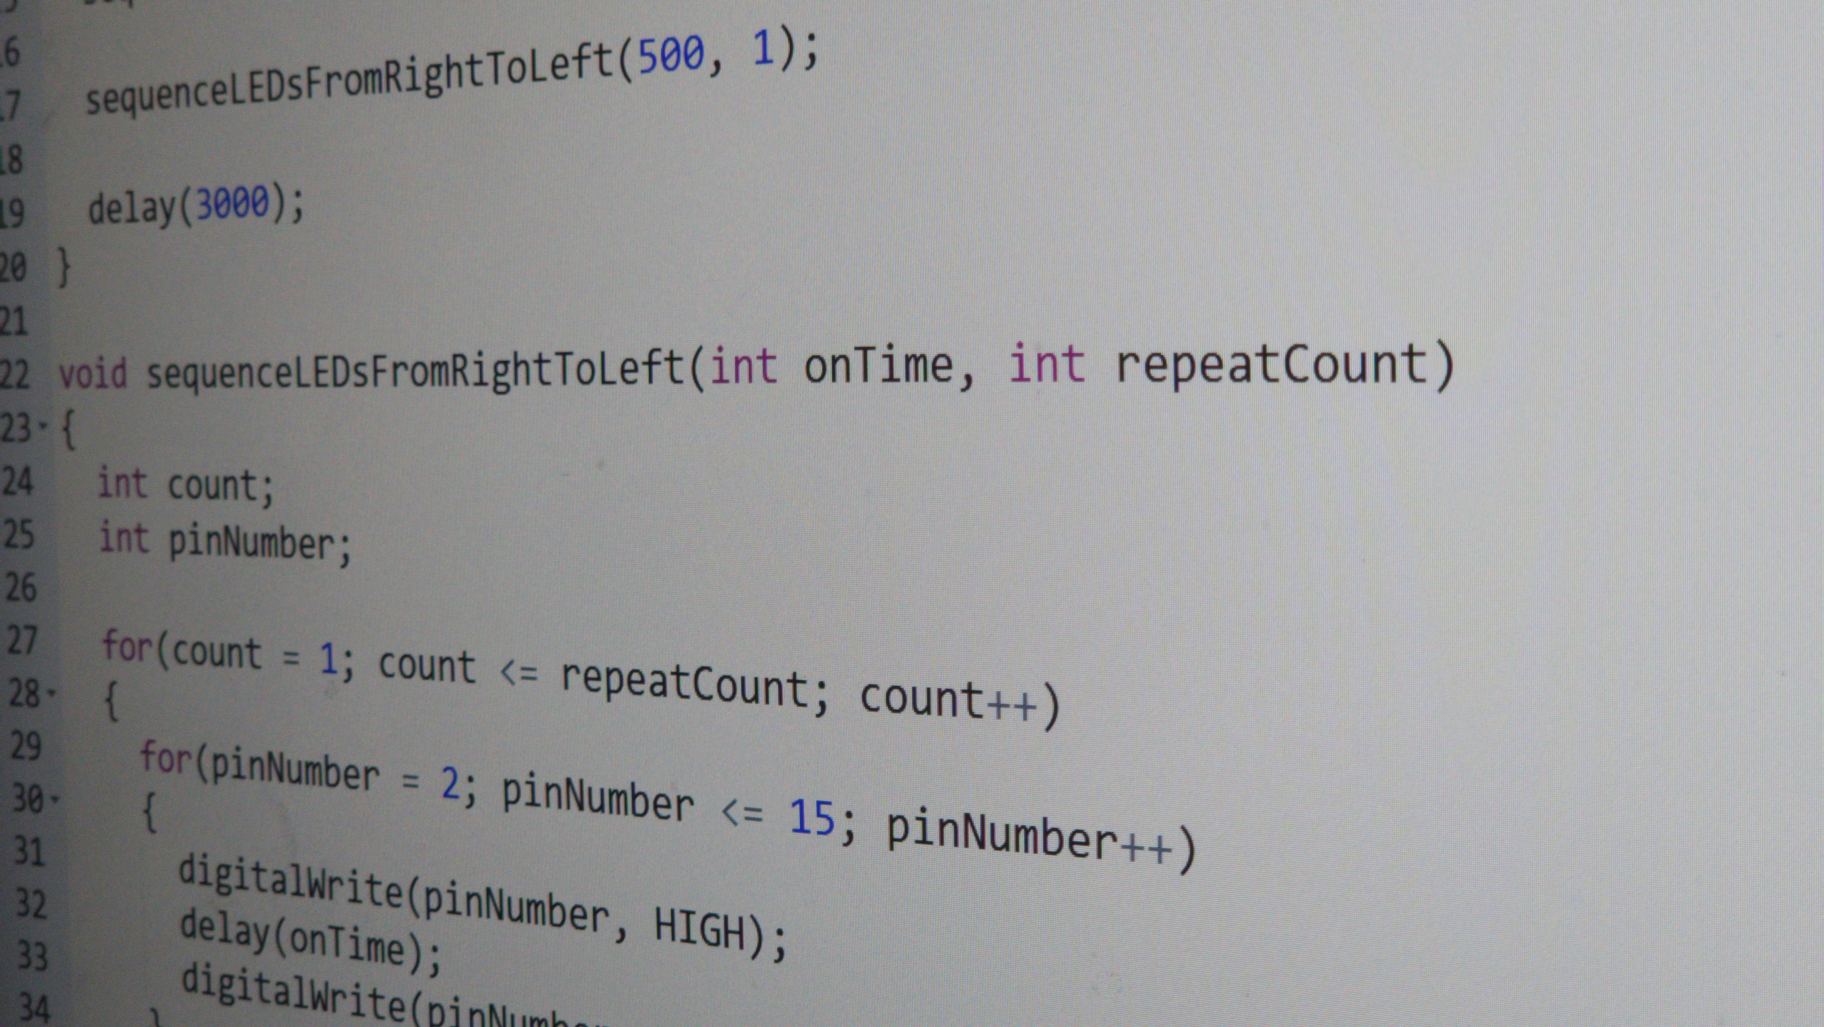
This exercise was fairly interesting. Again, I'll go chronologically through the code. We again intialize all the pins to output, nothing new there. You may notice that the loop() function is very minimal. Something else you may notice is a new type of loop, a for loop. These loops are similar to while loops, except that they also have the ability change the variables directly in the loop header. For example in this loop, an int count starts at one, then we have the condition, as long as count is less than or equal 3, then every time the code iterates, it adds one to count with count++. Another new thing we have here is custom functions, which are functions that you make yourself that you can call at any time. The for loop in loop() runs 3 times, each time calling two custom functions. It also passes variables into the functions. As you can see, lower, where the custom functions actually lay, in the header, different variables are declared. When you call a function with variables in the parenthesis, like I did in loop(), those variables are initialized to that value when you run the function. So, when I call sequenceLEDs2Through8(), onTime and offTime are set to 150, and repeatCunt is set to 1. Then there's another for loop inside that function, this one blinks LEDs 2 through 8 in accordance with the onTime and offTime. After that, the other function (sequenceLEDs15through9()) does the same, just going backwards from 15 to 9.
Exercise 49
Hmm. This looks familiar! This exercise takes a completely different approach to a very similar problem as exercise 36. Instead of using multiple loops to count forward and backwards, this exercise uses an array. In this case, it's an integer array. This means that the array can hold several different integers. When we declare the array, we put the total number of values, and an array only works when you put the same number of values in curly brackets when you set the variable. In this case it's effectively the same order as exercise 36, except it starts on the left side. I then created a simple for loop that loops three times, then I nested another for loop inside it. The inner for loop iterates 14 times, starting at 0. The reason that it starts at 0 is because we are using the index value to choose the pin that we want to blink using the index of a number in the array. In arrays, the first value always has the index of 0, and the other values have a value of one more each further value. Now, instead of having to make a complicated loop to go backwards, we can just use an array to list the pins we want to blink in any order we please. And that's what I did! Below you can see my code for exercise 49 running on an actual Arduino, powering the LEDs on my breadboard.
Conclusion (and Struggles)
To start with the struggles. The first problem that I ran into was the Arduino IDE not detecting my Arduino, preventing me from uploading code. I eventually noticed that when I manually tried to connect to the Arduino, my paired bluetooth earbuds were on the list along with the USB port. So I unpaired my earbuds and voila, it worked. I'm still not exactly sure what internal issue caused that, but I'm glad I was able to fix it. Secondly (as I mentioned earlier), when attempting to run code on my Arduino, I noticed that all of the LEDs seemed out of order. That was because the Arduino actually was using two analog pins and skipping the first two digital pins. But after I figured the wiring out, everything worked fine. I never got stuck for too long in the coding part. I think it's because I'm taking AP CSA concurrently with this class. This actually enhanced my learning, because, due to coincidence, we were learning about loops in AP CSA at the same time that we learned them in this class, so I effectively got more practice. This lead to me feeling pretty confident programming for this unit, and overall I think it went well.
last updated 1/17/2025